Friday, January 5, 2024

Hugs and Kisses Challenge Card (Brutus Monroe)

 This month's CYOEchallenge on the Brutus Monore Fan Club Page is:


Break out your sparkles and lets make some fun cards.  I started off the challenge this month with a live YouTube Video and made a Valentine Card. I will share the video at the bottom of this post

This card actually had many steps but it came together quite quickly.


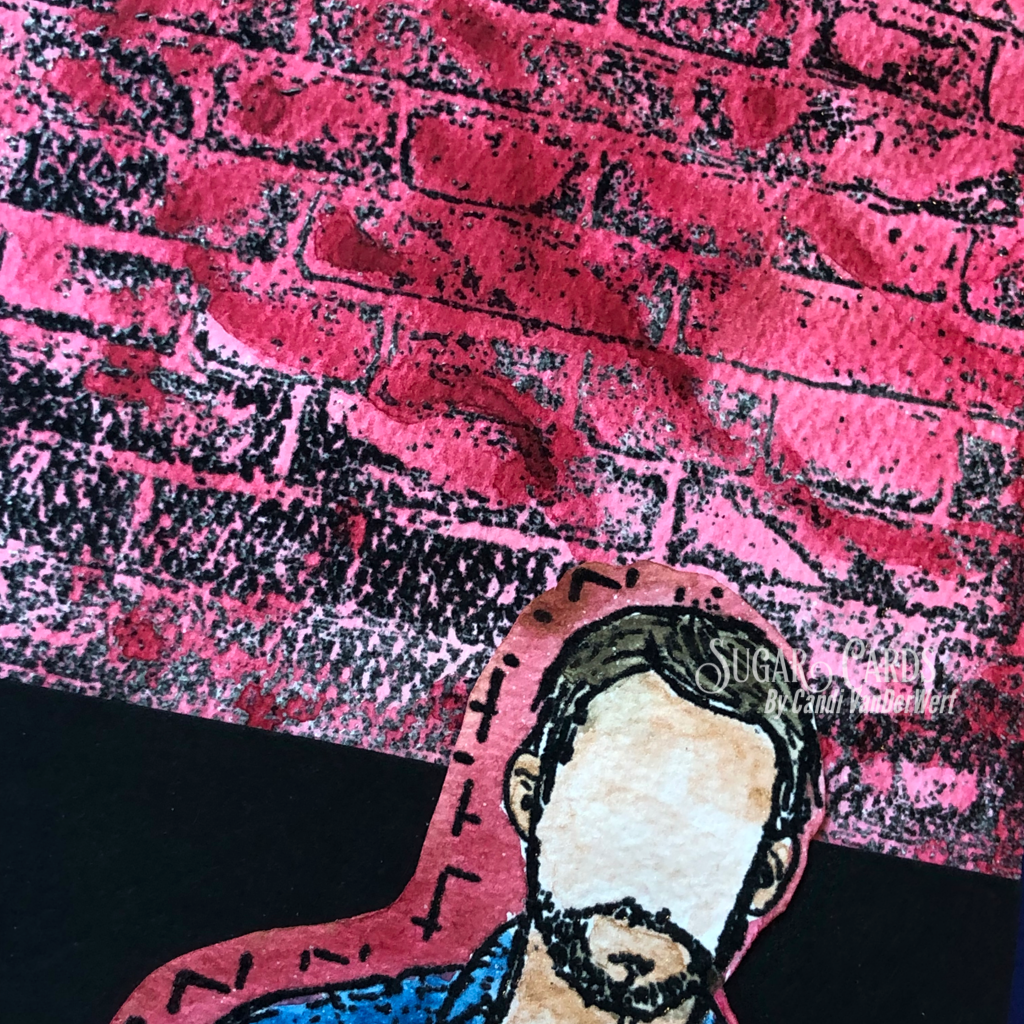
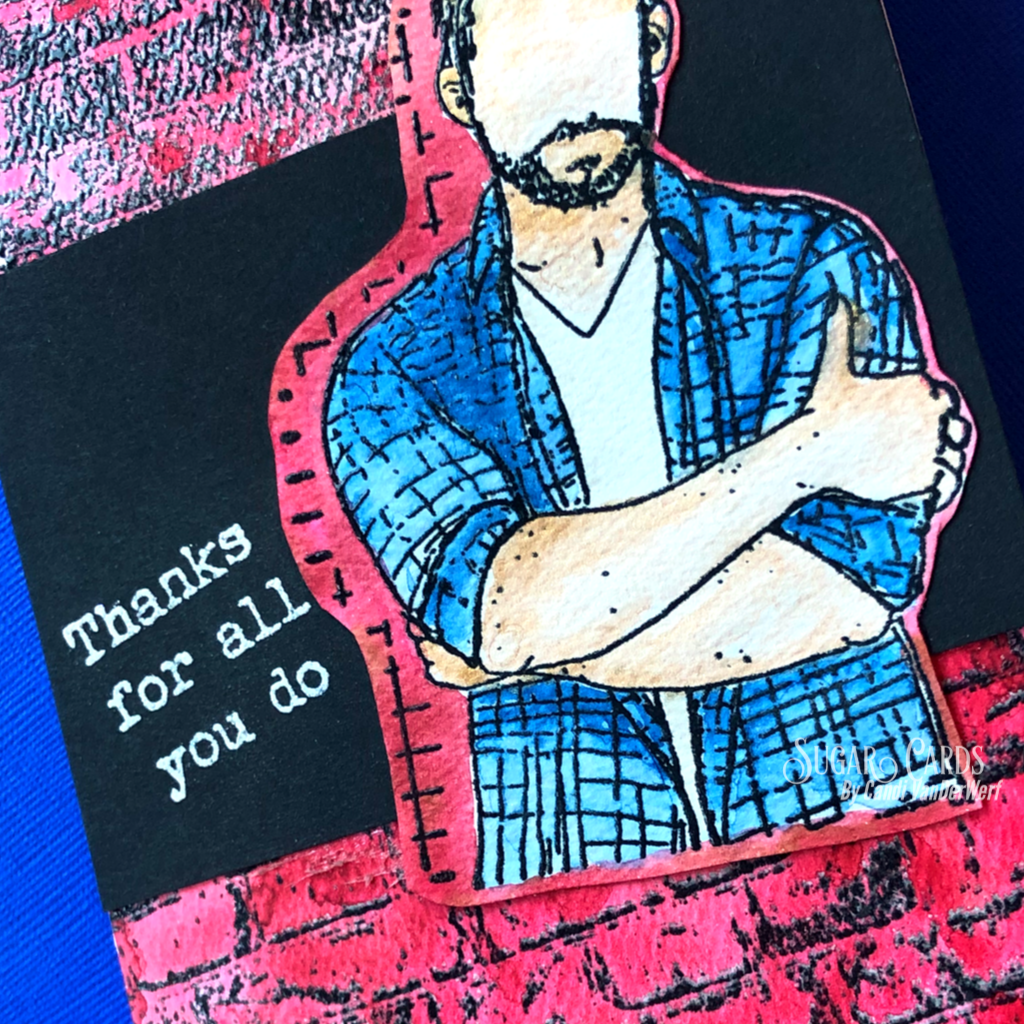
First before I prepared my images (from the My Valentine stamp set) by stamping them on Aqua Pigment Paper and Heat Embossing Icicle Embossing Powder over the Raven Detail Ink.  To save time during the video, I also die cut them out ahead of time.  Next, I started my background.  I took a piece of Rouge Cardstock and one layer of the Zig Hearts Layering Stencil and spread Garnet Glitter Glaze over it.  Once this was dry, I was ready to craft live.

I took the second layer of the stencil and ink blended Simon Hurley Create Crown Me Ink and for the third and final layer, I used the Pearl Embossing Powder over Embossing ink.  Because the Simon Hurley Inks take a min or so to dry, the Crown Me also has some Pearl EP heat set, which changed the color a bit but gave it some shine.

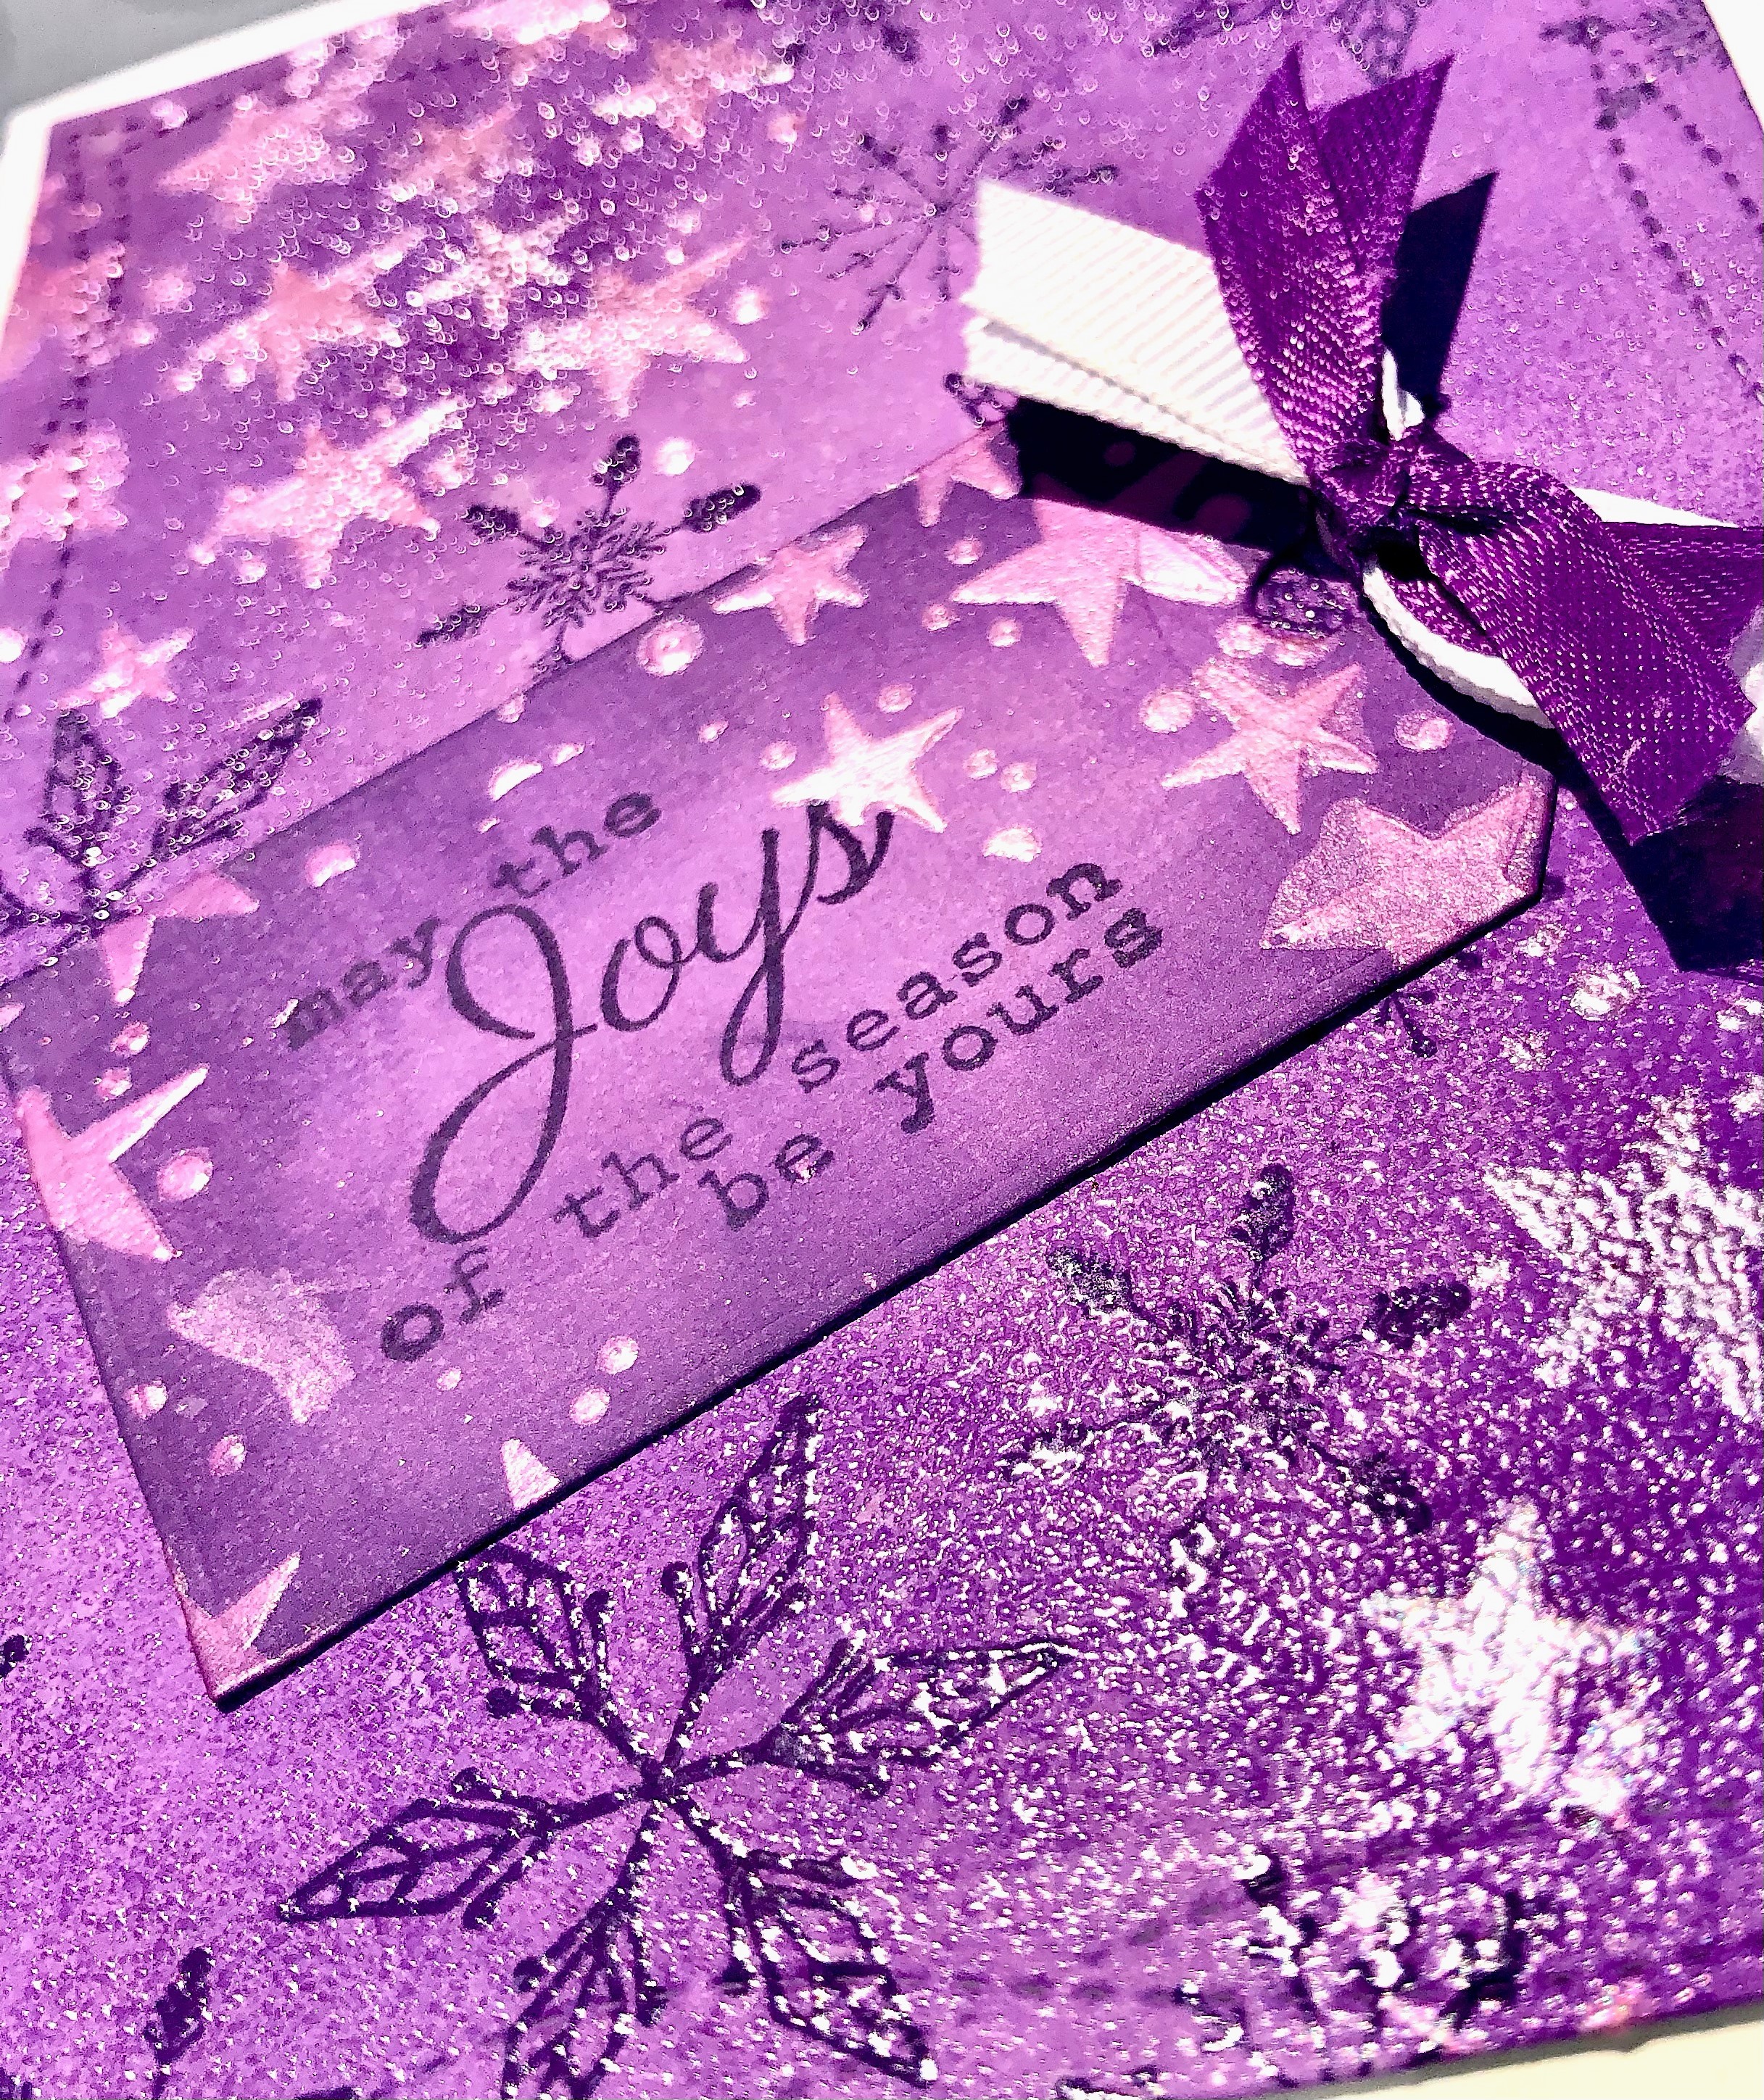
For the envelope, I sprayed some moare Aqua Pigment Paper with Pink Glow and Ornamental Gold Chroma Mist and let it dry.  Then I stamped the large image from Valentine Tag Stamp set with Simon Hurley Game Over Ink.  (this 4x4 stamp can be lined up to repeat the pattern).  The Envelope die is from an older set call Mom's and Dad's Day, and it creates the score lines to fold up the envelope which I adhered with some liquid glue.

I colored the images with a variety of Aqua Pigments and then decided my envelope needed something to break up the background and make it stand out more.  I used the scalloped heart from the My Valentine Coordinating Die set and cut it from Potion Cardstock.  I cut the heart from the center of my mat that I would layer the Zig Pattern layer on.  This saves some cardstock as no one will see that I cut the center out fo the mat layer.

Finally, I stamped the sentiment from the same set in the Crown Me ink on a scrap of white cardstock.  After adhering everything together, I grabbed some gems for a little more Shimmer/Shine from the Buttons Galore Jewelz Bright mix and then attached my matted panel to a Precut Prescored A2 Card Base.

I hope you join the Brutus Monroe Fan Club Page and enter into the montly contest.  The winner is chosen by random draw from the participants.  You can enter up to two (2) projects and you must use at least one (1) Brutus Monroe Product.  Thank you for stopping by and have a great rest of your day!

Here is a ist of products I used on this card. (affiliate links, this is no cost to you, however, it does help me bring you content):


Friday, September 15, 2023

Fall Greeting Slimline Card (Brutus Monroe)


The Fall Harvest sets is one of my favorites from the fall release.  I was so excited to color up these images one I saw this set.  I started with a Precut Slimline panel and stamped the first pumpkin to the left in Raven detail ink.  I colored it in with some Olo Markers and then used the Brutus Monroe Masking Paper to cover my image. Next, I stamped the leaves on the top of the pumpkin and colored those in.

Then I stamped the red/yellow apple, colored it in and masked it off.  I continued these same steps until I had all of my images stamped and colored.  

To add a little interest and color to my panel, I lightly inked the new Modern Web Stencil just above and to the left of my images with Simon Hurley Create. Woof! ink.

Finally, I stamped my greeting from the set and matted the panel with some light green cardstock from my stash.  I added the panel to my Precut Slimline Card panel that I scored and folded at 3.5" and add just a few green gems around my sentiment.

List of supplies:

Olo Markers

If you would like to view the whole fall release go here

Thursday, August 17, 2023

Slim Line Orange you Sweet Card (Brutus Monroe)

Today I have for you a punny slim line card.  I used the Brutus Monroe Keen Mixed Media Stencil on a Precut Slim Line Card Panel.  First I inkblended with Simon Hurley Traffic Cone ink.  Then I used the Orange chroma glaze over the top.  I didn't cover every area of the stencil so there are some Glaze parts and some inky parts.  


Next, I cut down my panel slightly and attached it on my Pre Card Slim line card base, which I scored and folded at 3.5" on the 7" side.  I used a piece of 1" x 8.5" white scrap cardstock for my sentiment.  I stamped both this punny sentiment and the Oranges with the same Traffic Cone ink and lightly colored in the oranges with Olo Markers.  Both the sentiment and Oranges are from the Breakfast Puns stamp set.


All links are affliate links, which helps bring me content but is no additional cost to you.  Thank you for using affliate links.

Friday, May 26, 2023

GIU Day 5--Last Day

 It's my last day for the Growing in Unity Week.  This week just flew by.  I hope you have enjoyed my cards as much as I did making them.  

Today I have another Slim line card.  It was inspired by my guy.  He is the best and he is my biggest fan and supporter (maybe even more than my mom! ) 😲  Shh don't tell her!


I did another watercolor card as I am having fun practicing my skills.  This time, I made my background with the Hit the Bricks background stamp.  Heat embossing clear embossing powder over Black Pigment ink.  I only stamped it part at the top and bottom as I knew the middle would be covered.

To color it, I sprayed the whole thing with a ton of water.  Then I added liquid water color to the top in random areas.  I used a red and brown color.  I sprayed it again with water to get the pigments moving and then twisted and turned it.  Then I smooshed it on my glass mat.  I used the left over to smoosh color on the bottom section.  After drying it with my heat tool, I did a bit more smooshing and then set it aside to dry completely.


For my image, I used Forrest Guy and after heat setting the same ink and embossing powder, I painted him in with Aqua Pigments.  Then I fussy cut him out.  Added a bit of the same red and brown to the edges.


I stamped my sentiment with White Pigment ink and covered with white embossing powder on a scrap of black paper. (I find I get a cleaner and bright white look using White ink with white embossing powder.)  Then once everything was dry I attached it all together.

Thanks for stopping buy everyday.  Please remember to leave a comment here so I can enter you in the giveaway.  As usual you can find my supply list (with affiliate links noted) below.  If you would like to see more content from me you can find me on Social media as Sugar Cards.  Links to all are on the right of page.  Have a great and safe Memorial Day weekend!


Supplies Used:

Thursday, May 25, 2023

GIU Day 4

 I can't believe it is Day 4 already.  Today I stepped out of my comfort zone to bring you a water colored image.  Water coloring images is one of my goals to get better at and I am feeling a little more confident in it.


I LOVE ANGIE GIRLS.  They are some of my favorite stamps of all time.  Today I featured Hannah!

I stamped her on some watercolor paper and then heat set the image with Clear Embossing ink.  I am most comfortable when I have that "edge" to my images when I watercolor.  I took my time and did a variety of colors (I will list them below).

For the background around her, I flooded the background with water and then just dropped in my color,  letting it flow itself.  Once my panel was dry, I carefully tore around the edges so that I could get that distressed look.  (I debated about adding watercolor to those edges but in the end left them white.--Would you have painted them?)

I used a lot of liquid glue to attach it to my panel.  This panel is just painted with a mix of blue and shimmer paint.  After I added my sentiment, I out on a few gems for some added sparkle and matted it to my card base.

Do you water color at all?  Or does it terrify you like it does me?


List of Supplies (affiliate links will be noted):

Wednesday, May 24, 2023

Growing in Unity Day 3

 The week is half over already!  Today for Day 3 if the Growing in Unity Week I am showcasing a Fun Slimline card. 


I started by making two masks for my flower.  Then starting in the center I stamped my flower, masked it.  Then I cleaned my stamp, moved it to another location (and rotated it) then stamped again.  I used my Misti for this as sometimes I needed to stamp twice to get a clean line around the mask.  Once again, I masked the flower, and stamped a third time.   Then I repeated at the top of my panel.

I colored in the images with some Olo markers and then fussy cut around the entire line of Daisies.  Using a Slim line card base (3.5" x 8.5"), I trimmed off one side to about 1/2"  I adhered my fussy cut flowers to the 1/2" flap with both double sided adhesive and liquid glue.  

For my sentiment I stamped one from the set out on white paper, trimmed down and then glued to the bottom third of my front panel.

For some added sparkle, I used my Shimmer pen over the blooms, here you can kind of see the shimmer.

Once again, thanks for stopping by.  Leave a comment for a chance to win a Unity Gift Certificate and stop back tomorrow for Day 4.

Supplies:
Misti
Olo markers
Scissors
White Card base 
Shimmer Pen


Tuesday, May 23, 2023

Growing in Unity Day 2

 Welcome back to my blog for Day 2.  Today I have a very colorful card for you today, using just a few items.  Once again I will list below the supplies used (noting affiliate links).  Remember to comment for a chance to win a GC to Unity Stamp Company.


This card started with me ink blending three inks, (all from Simon Hurley Create.) Prom Queen, Bee Sting and Shooting star.  Then using my Misti, I stamped the butterfly image from Your Smile four times using Versafine Nocturn ink and covered the wet in with Fairy Dust Embossing Powder.  After I heat set the butterflies, I pressed my Embossing Ink pad over the entire panel and the heat set some more Fairy Dust Embossing Powder.

For my sentiment, I stamped in the same black ink with Fairy Dust EP on some vellum and cut them out with a circle die.  I attached it with some spray adhesive and than matted the panel on some Black cardstock before attaching it to my A2 card base.


Thanks for stopping by for Day 2.  Don't forget to comment and come back tomorrow for a fun Slimline card.

Supplies:


Monday, May 22, 2023

2023 Growing in Unity Girl of the Week Day 1

Good morning and welcome to my blog.  Its been awhile since I have made a post.  This week I am the Unity Girl of the week and will be sharing a project everyday with you.  You have a chance to win a gift certificate to the Unity Stamp Company just by leaving a comment on my blog.  You can increase your chances by commenting everyday.

Today I have a Masculine Mini Slim Card for you.  I love Mini slim cards they are my favorite.  List of supplies with links (affiliates will be noted) are at the bottom of the post.


I started by using some tan cardstock and stamping the feather image in Embossing ink over the entire 3.25" x 6" panel.  I heat set my favorite clear embossing powder and then ink blended over the entire surface with Weeping Willow ink. (I realize that this feather stamp is not available anymore, but since it is just a backdrop.  I listed a few substitutes from the Unity site that could be used instead.  I apologize, I am trying to ink up unused stamps this year.)

Next I stamped the Deer head image with Weeping Willow ink and covered it with clear Embossing powder.  I used Olo Markers to color in the image. I used an older frame die from my stash to cut out the image and attach it to my panel. 

For my sentiment, I went direct to paper with Weeping Willow ink and then stamped and heat embossed this "punny" sentiment.  I did the same technique for the DAD die cut and then attached everything to my Mini Slim card base.

I hope you enjoyed my card and will stop by each day to see what I have planned.

List of Supplies

Wednesday, November 9, 2022

Rainbow Swirl Stencil Christmas Card


Today I bringing you a Christmas Card featuring the Rainbow Spiral Stencil. I used 4 Simon Hurley Create. Inks.  Two Reds (Love Struck and Game Over) and two greens (Overzealous and Fake Plant).  I started with Love Struck and blended the first stripe.  After I wiped the excess ink off the stencil, I used the lines on the stencil to line up my spiral and then blended with Game Over. I wiped the stencil off again, relined it up with Overzealous and then repeated with Fake Plant.

Continuing to wipe off my stencil between inks, I completed the spiral alternating back and fourth between the red and green inks until my circle was complete.  Next I used some watered down Pearl Aqua Pigment and a paint brush to cover the entire blended area.  This gives the spiral lots of shimmer and shine.

I trimmed the panel to 4" x 5.25" with my paper cutter. Using my scissors, I trimmed out the spiral around the outside and used a circle die to cut out the center.  I adhered the Spiral to and A2 Top folding Card base, lining up the spiral edge with the right edge of my card base. 

Next, I used another circle die to cut some Red Glitterstock for the center of my spiral.  I adhered this with some foam tape.  For a focal point, I stamped one of the elves from Crafty Elves with Raven Detail Ink on Perfect Blend Alcohol paper and colored him in with Copic markers.  After I fussy cut him out, I added some shimmer to the yellow on his outfit and to the red ribbon on the package (also with some watered down Pearl Aqua Pigment).

For my sentiment, I stamped the Merry Christmas from the Snowflake Swirl stamp set with Fake Plant and trimmed it down.  I adhered both my sentiment and elf to the center of the Glitterstock circle with liquid glue.

Finally, I added just a touch of more sparkle with some sequins from my stash.

Here is the video I made to go with this card:


Affiliate Links:

Rainbow Spiral Stencil: https://shrsl.com/3s8j2

Perfect Blend Paper: https://shrsl.com/3s8k8

Pearl Aqua Pigment: https://shrsl.com/3s8jt

Crafty Elves Stamps: https://shrsl.com/3s8jw

Crafty Elves Coordinating Dies: https://shrsl.com/3s8k4

Glitter Stock: https://shrsl.com/3s8k5

Circle Foundation Dies: https://shrsl.com/3s8lm

Raven Detail Ink: https://shrsl.com/3s8k9

Top Folding A2 Card Bases: https://shrsl.com/3s8ka

Simon Hurley Create. Love Struck Ink: https://shrsl.com/3s8kc

Simon Hurley Create. Game Over Ink: https://shrsl.com/3s8ke

Simon Hurley Create. Overzealous Ink: https://shrsl.com/3s8kg

Simon Hurley Create. Fake Plant Ink: https://shrsl.com/3s8kh

Copic Colors:

E000, R20 (Face and cheeks) Green: G28, YG63 Red: R37, R39 Gold: YR24 (belt buckle) Orange: YR09 (hair) Black: C6 (belt)


Friday, August 12, 2022

GIU Day 5 May the Joys of the Season by Yours

For my last day as a GIU girl, I had to make a Christmas Card.  Purple is my favorite color so I thought I would just play and see what happened.

I started with a piece of light purple paper from my stash and ink blended on Wilted Violet and Villainous Potion Oxide inks.  Next, I took the snowflakes from the Beauty of Life SMAK (11/19) kit and stamped them in Villainous Potion in a random pattern all over my card front.  Then I covered the snowflakes with Icicle Embossing Ink.  
Because oxide inks take a little bit to dry, the embossing ink stuck not only to the snowflakes but to portions of my panel.  I was okay with that as I heat set it, it made it feel like there was icy or frosty patches on my card.
Here you can see the shine on the snowflakes and on the frosty/icy patches on my card.

Then, I took a star stencil from my stash and in the upper and lower corners, I covered the stencil with Opal Chroma Glaze from Brutus Monroe and set my panel aside to dry.

Next, I took another piece of the light purple cardstock and cut it out with a tag die from my stash.  I  stamped the sentiment from Ember Girl in the Villainous Potion and ink blended the same two purple inks around the edges and once again used the Opal Chroma glaze and star stencil.

Once everything was dry, I cut the panel down with a double stitched rectangle from my stash and added the tag to the front. I chose a purple and white ribbon from my stash, tied them in a knot.  To add the ribbon to my card, I used a glue dot.  Then I attached the panel to my white A2 card base.

I hope you enjoyed my week showcasing some of the Unity Products.  Head over to Unity Stamp Co. Website and pick up some goodies for yourself.


Thursday, August 11, 2022

GIU Day 4 Celebrate Foil Card


For day three I thought I would do some foiling.  I used the Unity/Deco Foil Toner Card Fronts {Wild Garden and used a Red Copic Marker (R37) for the berries and I used C3 and C1 to give some color to the flower centers.  Then Using some Silver Deco Foil and My Solid Hot Plate, I added the shine to my card front.  Next, I ran the panel and a red piece of cardstock through my die cut machine with a stitched rectangle die.


For my sentiment I cut out a piece of vellum and stamped the Celebrate from the Celebrate the New set with some Red Pigment Ink and covered it with Icicle Embossing Powder.  I ran it through my diecut machine with another stitched die.  To attach it to my card, I ran it through my Xyron sticker maker.

I finished off the card by adding everything to a white A2 Card base.  I love that this has a Christmas feel but yet, I can use if for multiple occasions.  Below is one a photo that tries to capture the shine of the foil.


Hugs and Kisses Challenge Card (Brutus Monroe)

 This month's CYOEchallenge on the Brutus Monore Fan Club Page is: Break out your sparkles and lets make some fun cards.  I started off...