Today I have for you a punny slim line card. I used the Brutus Monroe Keen Mixed Media Stencil on a Precut Slim Line Card Panel. First I inkblended with Simon Hurley Traffic Cone ink. Then I used the Orange chroma glaze over the top. I didn't cover every area of the stencil so there are some Glaze parts and some inky parts.
Next, I cut down my panel slightly and attached it on my Pre Card Slim line card base, which I scored and folded at 3.5" on the 7" side. I used a piece of 1" x 8.5" white scrap cardstock for my sentiment. I stamped both this punny sentiment and the Oranges with the same Traffic Cone ink and lightly colored in the oranges with Olo Markers. Both the sentiment and Oranges are from the Breakfast Puns stamp set.
All links are affliate links, which helps bring me content but is no additional cost to you. Thank you for using affliate links.
Welcome back to my blog for Day 2. Today I have a very colorful card for you today, using just a few items. Once again I will list below the supplies used (noting affiliate links). Remember to comment for a chance to win a GC to Unity Stamp Company.
This card started with me ink blending three inks, (all from Simon Hurley Create.) Prom Queen, Bee Sting and Shooting star. Then using my Misti, I stamped the butterfly image from Your Smile four times using Versafine Nocturn ink and covered the wet in with Fairy Dust Embossing Powder. After I heat set the butterflies, I pressed my Embossing Ink pad over the entire panel and the heat set some more Fairy Dust Embossing Powder.
For my sentiment, I stamped in the same black ink with Fairy Dust EP on some vellum and cut them out with a circle die. I attached it with some spray adhesive and than matted the panel on some Black cardstock before attaching it to my A2 card base.
Thanks for stopping by for Day 2. Don't forget to comment and come back tomorrow for a fun Slimline card.
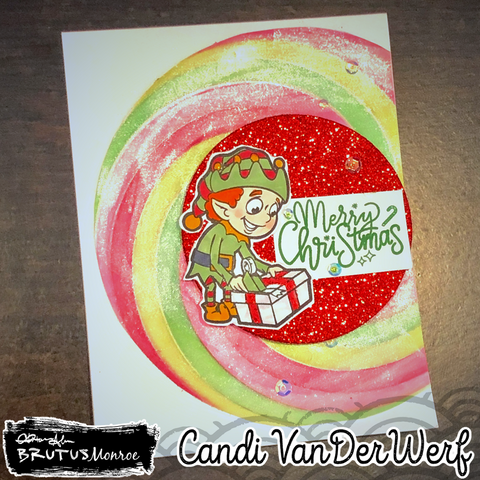
Continuing to wipe off my stencil between inks, I completed the spiral alternating back and fourth between the red and green inks until my circle was complete. Next I used some watered down Pearl Aqua Pigment and a paint brush to cover the entire blended area. This gives the spiral lots of shimmer and shine.
I trimmed the panel to 4" x 5.25" with my paper cutter. Using my scissors, I trimmed out the spiral around the outside and used a circle die to cut out the center. I adhered the Spiral to and A2 Top folding Card base, lining up the spiral edge with the right edge of my card base.
Next, I used another circle die to cut some Red Glitterstock for the center of my spiral. I adhered this with some foam tape. For a focal point, I stamped one of the elves from Crafty Elves with Raven Detail Ink on Perfect Blend Alcohol paper and colored him in with Copic markers. After I fussy cut him out, I added some shimmer to the yellow on his outfit and to the red ribbon on the package (also with some watered down Pearl Aqua Pigment).
For my sentiment, I stamped the Merry Christmas from the Snowflake Swirl stamp set with Fake Plant and trimmed it down. I adhered both my sentiment and elf to the center of the Glitterstock circle with liquid glue.
Finally, I added just a touch of more sparkle with some sequins from my stash.
For my last day as a GIU girl, I had to make a Christmas Card. Purple is my favorite color so I thought I would just play and see what happened.
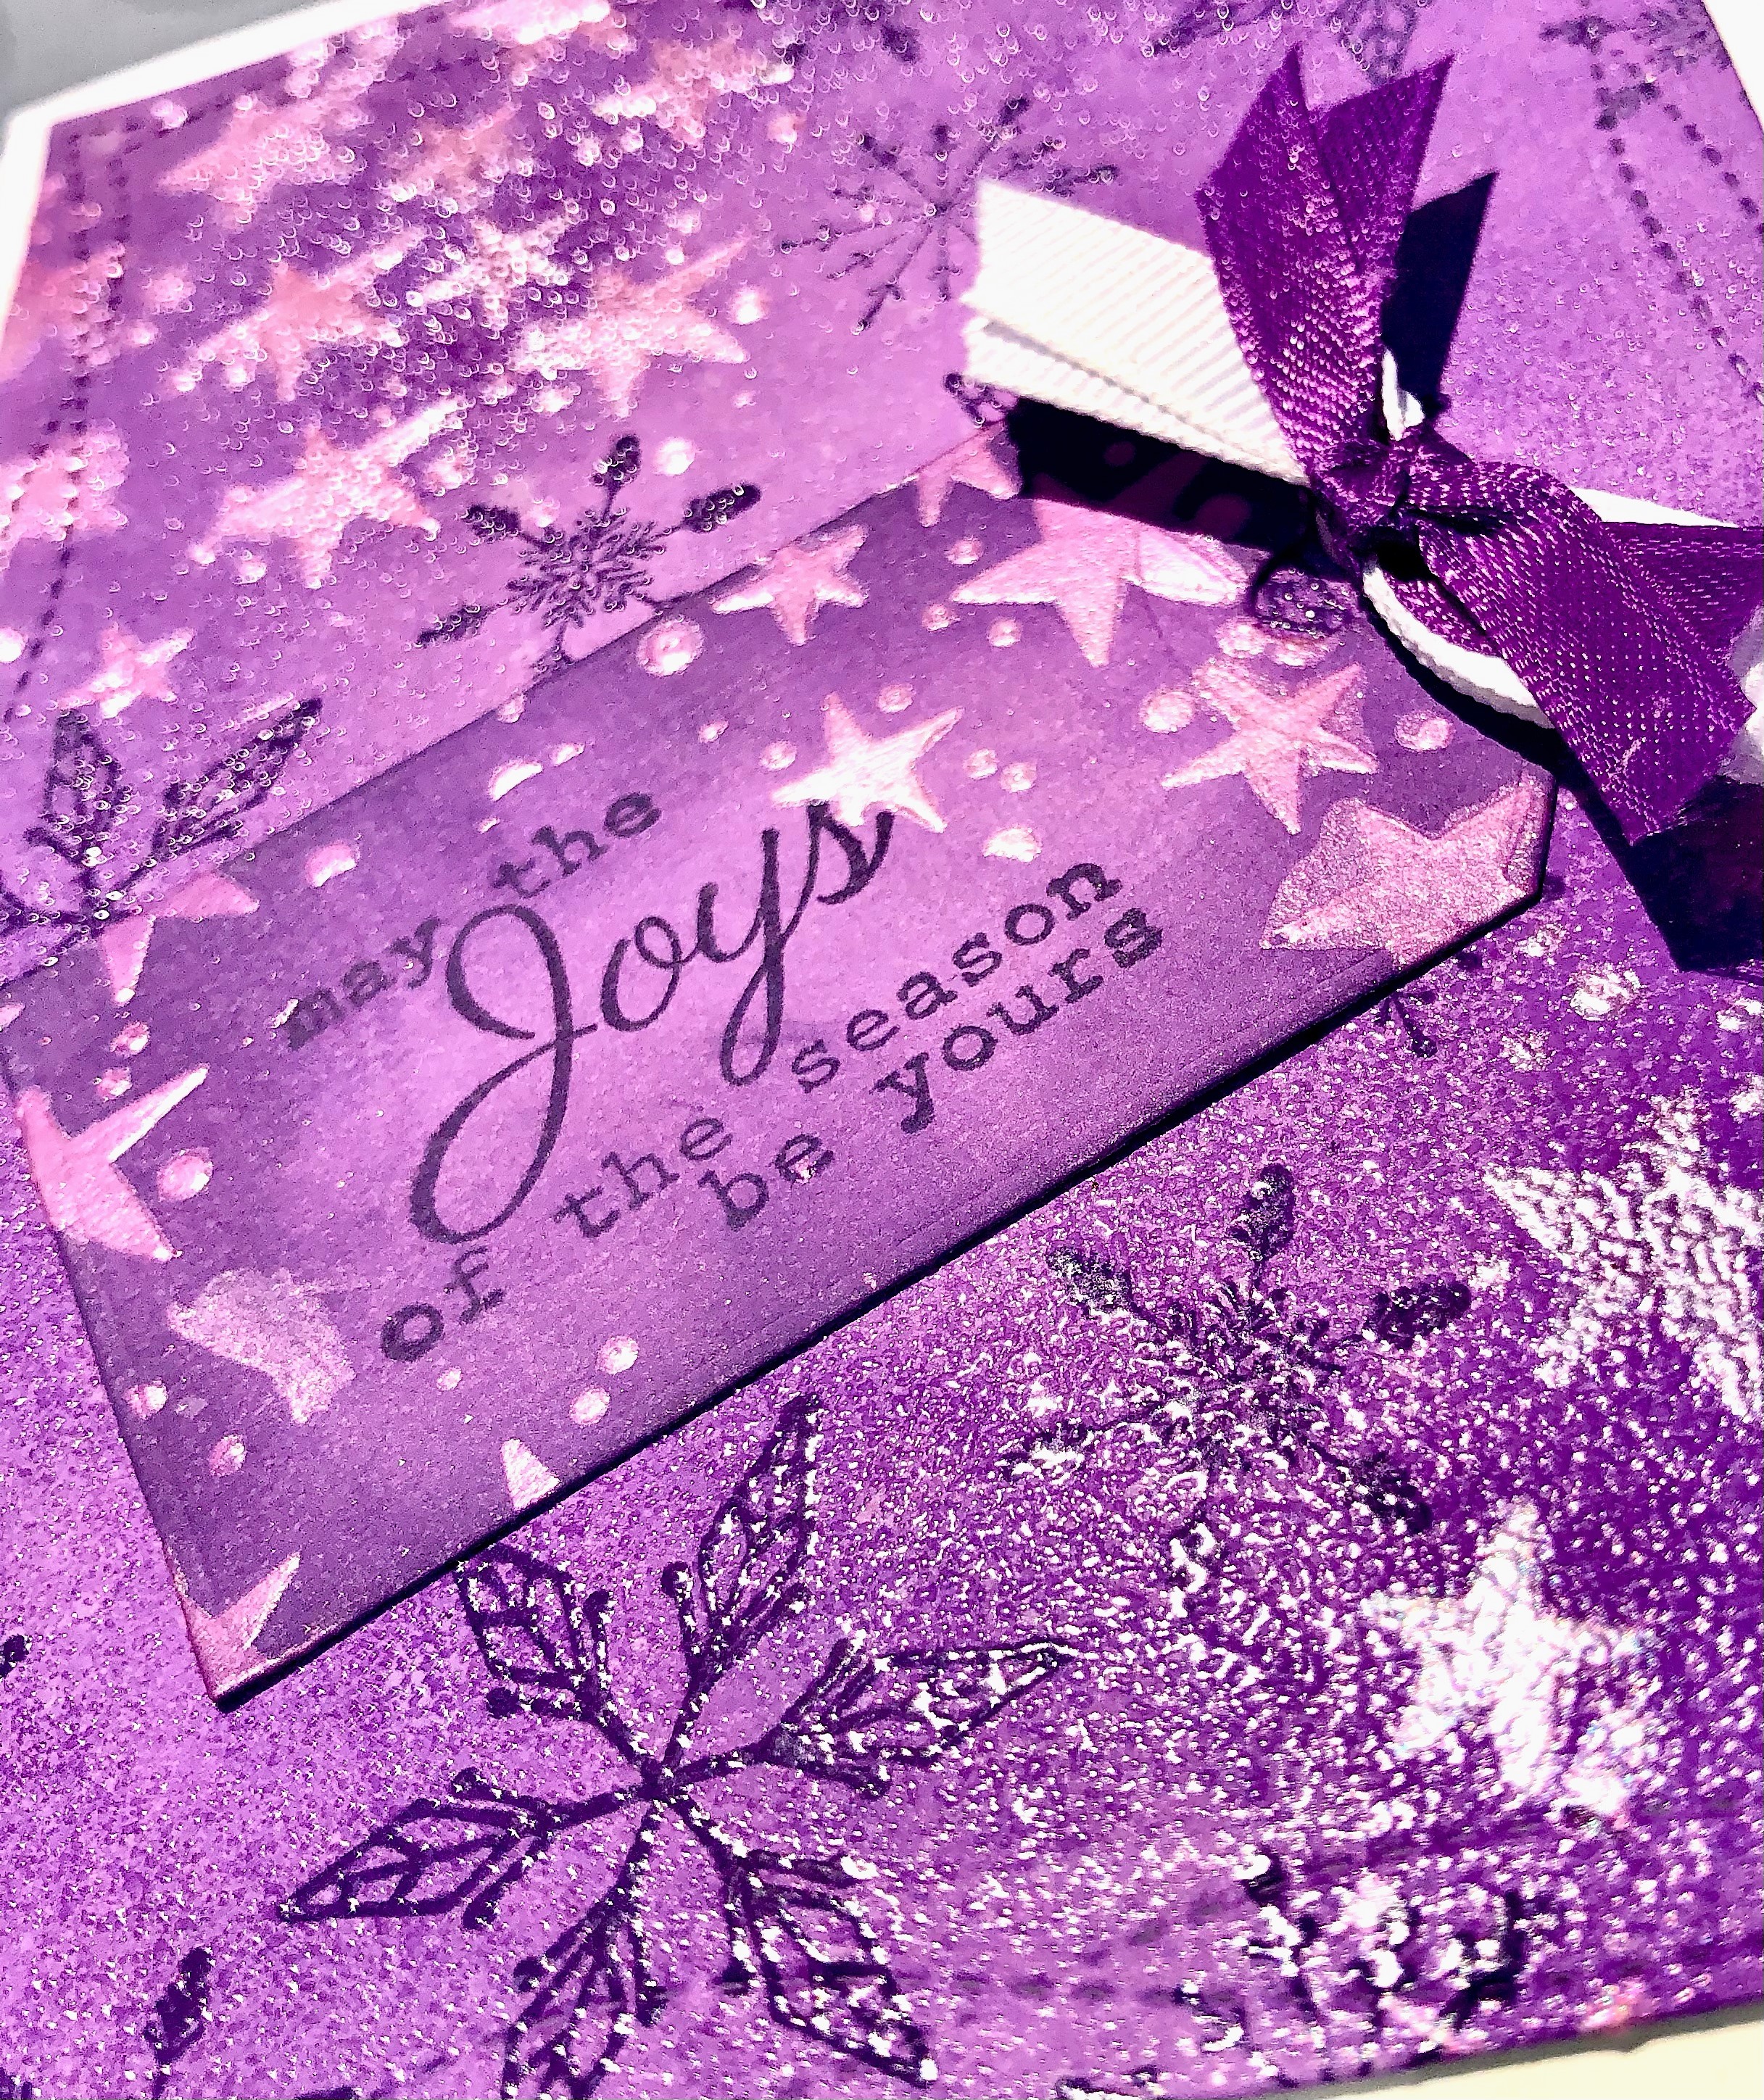
I started with a piece of light purple paper from my stash and ink blended on Wilted Violet and Villainous Potion Oxide inks. Next, I took the snowflakes from the Beauty of Life SMAK (11/19) kit and stamped them in Villainous Potion in a random pattern all over my card front. Then I covered the snowflakes with Icicle Embossing Ink.
Because oxide inks take a little bit to dry, the embossing ink stuck not only to the snowflakes but to portions of my panel. I was okay with that as I heat set it, it made it feel like there was icy or frosty patches on my card.
Here you can see the shine on the snowflakes and on the frosty/icy patches on my card.
Then, I took a star stencil from my stash and in the upper and lower corners, I covered the stencil with Opal Chroma Glaze from Brutus Monroe and set my panel aside to dry.
Next, I took another piece of the light purple cardstock and cut it out with a tag die from my stash. I stamped the sentiment from Ember Girl in the Villainous Potion and ink blended the same two purple inks around the edges and once again used the Opal Chroma glaze and star stencil.
Once everything was dry, I cut the panel down with a double stitched rectangle from my stash and added the tag to the front. I chose a purple and white ribbon from my stash, tied them in a knot. To add the ribbon to my card, I used a glue dot. Then I attached the panel to my white A2 card base.
I hope you enjoyed my week showcasing some of the Unity Products. Head over to Unity Stamp Co. Website and pick up some goodies for yourself.
For GIU Day 3 I have a Mini Slim Line card for you. Mini Slims are one of my favorite to create. I started by stamping the jack-o-lantern image from the Unity Stamp Co. Hallows' Eve Tree all over the front of my 3.5" x 6.25" panel with Black pigment ink. I covered the Black Pigment Ink with Clear embossing powder to heat set it.
Next, I used Carved Pumpkin Distress Oxide ink over the entire panel, and a little Black Soot Oxide ink over the edges. Then I took a script stamp from the SMAK Kit Happy Little Moments (July 2015) and stamped it randomly over the entire panel with White Pigment Ink and set it aside for a bit to dry.
While I waited for the White ink to dry and fade back a bit. I took some Orange Chroma Glaze from Brutus Monroe and spread it on a piece of packaging that I took out of the recycling and set it aside to dry as well.
Once the Chroma glaze was dry (about an hour depending on thickness), I used an older Spellbinders die to cut the pumpkin from it. Next. I cut my panel down to about 3" x 6" panel and wrapped a piece of black tulle around the bottom third of my panel using strong double stick tap to secure it to the back. I took a smaller piece of tulle to tie a knot on the left and a glue dot to attach my pumpkin to the knot.
Next, I layered the panel on a piece of black cardstock and then lined it up in my Misti to stamp my sentiment; using the same black pigment ink and clear embossing powder as my jack-o-lantern banner. Finally, I attached the whole thing to my white card base that measures 3.25" x 6.25."
Since Father's Day is this weekend, I thought I would show you the card I made for my dad. Sometimes its hard to know what to use for a masculine card and my go-to is usually a brown and a blue color.
I started with the June 2022 Stencil of the month Groovy Grid. Using my Stick and Stamp Mat and coordinating Blending Buddy, I placed my 4.25" x 5.25" white card panel in the middle, with the stencil on top. I used my blending tools to add Simon Hurley Creates Grrr! and Clear Skies inks in a random panel over the stencil.
Then I cut the panel and a brown mat with some stitched rectangle dies from my stash. I cut the dad from the center of my brown mat (since it will be covered by my panel).
Next I cut out two of the smaller and one of the larger leaves from the Fabulous Florals set and ink blended some Clear Skies ink over them. I just used what was left on my brushes and did a light coat so that some of the white cardstock showed through as well.
For my companion sentiment, I stamped the You're my Favorite (from Super Sentimental) in Clear Skies in and cut it out with a stitched die from my stash. To soften the white of the circle, I lightly blended some of the leftover Grrr! ink from my brush around the edges and along the edges of my dad letters (cut from an alphabet set in my stash).
After I matted the card panel and mat to my Precut A2 Card base, I used the Dad letters to line up my circle sentiment and leaves. Finally, I added my DAD over the top of the leaves and just overlapping the bottom of my companion sentiment a bit.
Here is a look at my card one more time:
Thanks for joining me today. Have a fabulous rest of the week and remember to create something everyday!