Saturday, October 23, 2021

Brutus Monroe Oh My Gourd Aqua Pigment Shaker Card


I started with a piece of Black Watercolor paper and some White and Pearl Aqua Pigments on my glass mat.  I sprayed the Aqua Pigments with a little water and then pressed my watercolor paper into it.  I kept ink smooshing my paper and drying in between until I was happy with my pattern.  Next I used the Oh my Gourd die and ran my panel through my die cut machine, keeping the negative for my card and putting the die cut aside for now.

Then, I cut about 6 -8 more of the negative panels with the die from white scrap cardstock and glued them all together.  I used some strong double sided tape to the back of my black die cut panel and attached a piece of acetate to the panel.  Then I used more strong double sided tape to the front stacked white die cut pieces.   I flipped over the stacked panels with the negative or frame.  I temporarily placed the Oh my Gourd die cut into the center of the negative stacked piece. After spreading liquid glue all over the Oh my Gourd die cut piece and carefully lined up my A2 Card base on top.  After gently flipping it over, I removed the negative/frame piece and pressed the Oh my Gourd die cut piece in place.  


Then I added some glitter and sequins to the center of my card panel, right in the center of the Gourd.  Then I added more double stick tape and some liquid glue to the negative/frame piece.  I attached it to the front of my  card base creating a shaker card.  Then I took a piece of white cardstock and stamped the hell Gourd-Geous sentiment with Raven Detail ink and cut it out with a banner die.  I attached the sentiment to the front of the panel to finish the card.

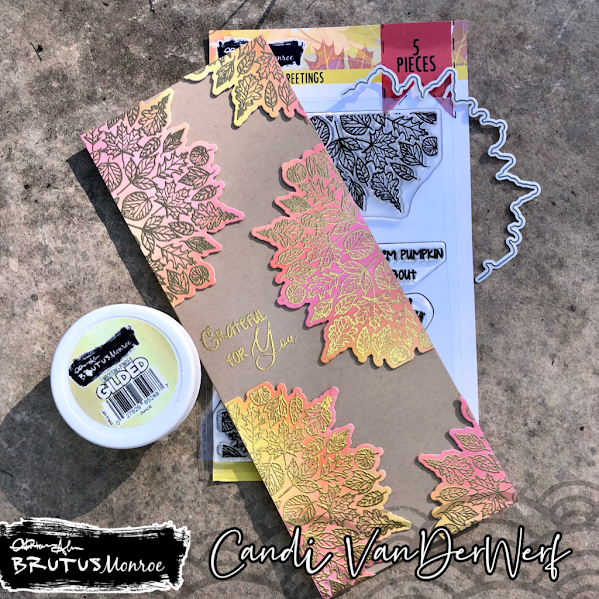
Here is a list of the products used that are available in the Brutus Monroe store, like always these affliated links do not cost you anything extra, however they help support me to bring you new content.

Wednesday, October 20, 2021

Brutus Monroe Grateful For You Slim Line Card


I started by taking Bee Sting, Sike! and Slippery When Wet inks from Simon Hurley Creates and blended up a couple of white card panels.  Then I used my antistatic bag to treat the front of the panels, lined them up (individually) in my Original Misti and stamped both of the leaf images from Grateful Greetings with Brutus Monroe Embossing Ink.  I covered the ink with Gilded Embossing Powder and heat set it.  (I repeated this until I had 6 embossed images--I only needed 5).


Next I cut out each of the Embossed panels with the coordinating die, and trimmed the end off with my paper trimmer.  I also cut out 10 pieces of the die cut with Kraft paper.  I stacked two of each die cut together with liquid glue and attached one of my Inkblended/Embossed images on top.  This creates dimension for the front of my card.  I created my card base from some Kraft Colored cardstock.  I cut the 8.5" x 11" cardstock down to 8.5" x 7" and scored at 3.."  This creates a slim line card base that measures 8.5" x 3."


I chose my sentiment from the stamp set and used my die cuts for placement and then stamped it in Embossing Ink.  I also covered it with Gilded Embossing Powder and heat set it.  Then I used liquid glue to attach one of my Embossed Die cuts opposite of my sentiment.  Then I placed two of the Embossed Die cuts to the left side of my card base.  For my last two pieces, I attached them at an angle on the right side of my cardbase in each corner.  Finally, I used my paper trimmer to cut off an overhanging piece of die cuts.

Here are (affliated) links to the products used in the Brutus Monroe Store-as always affilated links do not cost you anything extra, they just help me bring you new content.)


Sunday, October 17, 2021

Brutus Monroe Spooky Kids (6 cards)


Today I have 6 cards to share with you from the Spooky Kids Stamps and Coordinating Die set from Brutus Monroe.  Each card also features a different stencil and glaze also from Brutus Monroe. 


VAMPIRE

I started with Raven Cover Cardstock cut down to 4.25" x 5.5". I used some low tack tape to attach the Batty Stencil to my cardstock.  Using a silicone spatula, I spread some of the Night Sky Velveteen Glaze in the upper corner of the stencil and covered just part of it.  I only wanted a small pattern of the bats for this card.  I set the panel aside to dry.  Once it was dry I used the second largest Rectangle Foundation die to cut it out.  I used another Rectangle die from my stash to cut out a mat layer from Scarlet Cover Cardstock.  I used my embossing bag to treat the Scarlet cardstock and stamped the sentiment from Spooky Sentiments with Brutus Monroe Embossing Ink, in the center.  I covered the sticky ink with Raven Embossing Powder and heat set it.  I used a banner die from my stash to cut out the sentiment.   (Using the middle of the mat paper for my sentiment saves on paper and once I mat the Black card panel on the top, no one will ever know that I cut out a piece from the Scarlet mat.)  I stamped the Vampire from the Spooky Kids stamp set with Raven Detail ink on some Perfect Blend Alcohol Paper.  Then I colored him in with a variety of Copic markers and cut him out with the Coordinating Die.  I used liquid glue to put my card panel together with the Image, sentiment and mat.  My cardbase is made from Raven Cardstock and is standard A2 size.  For the inside of the card, I placed another piece of Scarlet cardstock, and stamped a Happy Halloween sentiment with Raven detail ink.


GHOST
I started with Raven Cover Cardstock cut down to 4.25" x 5.5". I used some low tack tape to attach the Hoiden Stencil to my cardstock. I carefully covered just the stencil with Glow in the Dark Chromas Glaze, making sure not to go outside the edges of the stencil (this is a circular stencil). I set this panel aside to dry.  Once it was dry I cut it with the second largest Rectangle Fondation Die and my mat was cut with a large Rectangle die from my stash and a green piece of paper from my scrap bin.  I used my powder tool on the green mat and stamped the sentiment from Spooky kids with Brutus Monroe Embossing ink.  After covering with Raven Embossing Powder, I heat set it and cut it out with a rectangle die.  I stamped the Ghost from Spooky Kids with Raven Detail ink on Perfect Blend Alcohol Paper and colored him in with Copic markers. After I used the coordinating die to cut him out, I used liquid glue to attach my sentiment and image to the front of my panel.  Then I attached the panel to the green amat.  To finish my card,  I chose a white A2 Card base and used liquid glue to attach my matted panel.


ZOMBIE
 I started with Raven Cover Cardstock cut down to 4.25" x 5.5". I used some low tack tape to attach the Slim Line Ripple Stencil to my cardstock at an angle. I covered the edges of my stencil with low tack tape to protect the card panel. Using a Silicone spatula, I spread some Lima Bean Velveteen Glaze across the entire stencil.  (My mind saw this stencil as a brain pattern, which I thought would fit nicely with the zombie.) While the panel was drying, I stamped my image with Raven Detail ink on some Perfect Blend Alcohol Paper,colored it in with Copics, and cut it out with its coordinating die.  Next, I cut down a green piece of paper with a rectangle die from my stash.  I treated the paper with my embossing bag and after stamping my sentiment from Spooky Sentiments with Brutus Monroe Embossing Ink, I covered it with Raven Embossing powder, heat set it and cut it out with a die from my stash.  Once my panel was dry, I used the second largest of the Rectangle Foundation dies to cut it out and mat it on my Green piece.  I used liquid glue to attach my zombie and sentiment to the front of my stenciled panel.  I attached the entire thing to a Raven A2 card base.  Inside I included another piece of green paper with a Happy Halloween Sentiment stamped on it.


WITCH
Taking a piece of white cardstock I attached the Random Dots Stencil with low tack tape.  I took some Marmalade and Amethyst Glitter Glaze and spread each color on a different side.  Then I carefully combined the colors in the middle.  I set the panel aside to dry and worked on my image.  The Spooky Kids witch was stamped on Perfect Blend Alcohol paper with Raven Detail ink and colored in with Copic markers.  I used the Coordinating die to cut her out.  Next, I looked through my scrap bin and found a light purple piece of patterned paper and cut it out with a rectangle die from my stash.  I cut a circle out of the center of the purple panel.  After treating the circle with my embossing bag, I stamped the sentiment from the set with Embossing Ink and covered it with Alabaster Embossing powder.  After heat setting it, I attached it to the front of my card panel along with my colored witch with liquid glue.  Then I glued the panel to my purple mat and then glued the whole thing to the front of my landscaped A2 white card base.


FRANKIE
I started with Raven Cover Cardstock cut down to 4.25" x 5.5". I used some low tack tape to attach the Slim Line Pathway Stencil to my cardstock. I covered the right edge of my card panel with low tack tape to protect it from my glaze.  I used a silicone spatula to spread the Purple Galaxy Glaze over the stencil.  Once I removed the stencil, I sprinkled some Fallen Snow Glitter over parts of the wet glaze for some sparkle and set the panel aside to dry. Next, I stamped the zombie image on some Perfect Blend Alcohol Paper with Raven Detail ink, I colored it in with Copic markers and cut it out with the coordinating die.  Using a scrap piece of purple paper cut down with a Rectangle die from my stash, I stamped my sentiment from the set with Embossing ink.  I sprinkled it with Alabaster Embossing Powder and heat set it.  Then I used a rectangle die to cut it out of the center of my mat.  Once.my Galaxy glaze panel was dry, I used the second largest Rectangle Foundation die to trim it down and attach it to my purple mat.  I used liquid glue to attach my sentiment and Frankie to the front of my panel.  Then I attached the entire thing to a white A2 card base.


PUMPKIN
I started with a piece of white cardstock cut down to 4.25" x 5.5". I used some low tack tape to attach the Kramer Stencil to my cardstock.  I used a silicone spatula to spread some Lima Bean Velveteen Glaze over the entire panel and then set it aside to dry.  One it was dry, I cut it out with the second largest Rectangle Foundation die.  I matted the panel on a piece of orange with white polkadot paper from my scrap bin.  This patterned paper was cut down to a mat side with another rectangle die from my stash.  Before I attached the panel to the patterned paper, I cut out a rectangle from the center with a die from my stash.  I treated this rectangle with my antistatic bag and stamped my sentiment with Brutus Monroe Embossing Ink.  I covered the ink with Raven Embossing Powder and heat set it.  I attached the Pumpkin girl and sentiment to the front of my matted Velveteen panel with liquid glue.  Then I attached the entire thing to my white A2 card base.


List of Products Used (available in the Brutus Monroe Store):  Affliated links are not at any additional cost to you, however, they help support me to bring you new content.

Saturday, October 2, 2021

Stocking Shaped Card with Brutus Monroe

I started by taking an A2 card base and placing the solid outline of the Stocking Die with the left edge hanging over the fold of my cardbase and running it through my Big Shot.  Then I ran it through again with a piece of white cardstock and attached it to my stocking Cardbase.  This covers up the unfinished edge along the fold on my card base.


Taking a piece of white cardstock I sprayed the entire piece with Candy Apple Chroma Mist and Pearl Shimmer Mist and then set it aside to dry.  Once it was dry I ran the piece through my Big Shot with the Decorative (inside) Stocking Die and removed all the inside pieces.  Then I took another scrap piece of white cardstock and ran the Decorative (Inside) piece with just the top "cuff" part of the die.  Then I punched out the holes.  Using a paintbrush I covered the "cuff" piece with Pearl Aqua Pigment.  After about 10 mins of drying time, I trimmed the bottom edge of the cuff with my scissors to match the top edge of the die.  Then I used liquid glue to attach it to the Candy Apple/Pearl stocking piece.

For the backer of the stocking, I ran the outline die through with a piece of dark green cardstock scrap.  Using liquid glue to attach it to the Green outline piece to my cardbase.  Then I attached the Candy Apple/Pearl stocking piece.  Using some clear jewels and tiny green gems, I used some liquid glue to attach them to each of the circles on the Cuff part of the stock.  For a sentiment I used a Christmas Wishes die from my stash and die cut some Silver Mirror card scrap and attached it with liquid glue.  For a finishing touch, I used liquid glue to attach another of the tiny green gems to the "i' in Christmas.


Friday, October 1, 2021

Got Brains? Halloween Card with Brutus Monore

Today's card was inspired by one of my favorite TV shows. I started by stamping the adorable Zombie from Spooky Kids with Raven Detail ink on Perfect Blend Alcohol Paper.  Then I colored him in with some Copic Markers.  I used the coordinating die to cut out the image and then I cut 4 more zombies out of white scatch paper and glued them all together.  This builds dimension behind my colored image.

My cardbase is made from Raven Cardstock and is an side folding A2 card. I placed it in my splat box and splattered some Pearl Shimmer Spray.  Next a peice of gray cardstock and stamped it with a woodgrain stamp from my stash with Woof! ink from Simon Hurley Creates.  Then I cut it out twice with the Woodland Forest Die.  

For my zombie herd, I cut several from black cardstock scraps.  I used a blending tool and Pumice Stone Distress Oxide ink on each of the zombies to give a little shadow to each diecut.  Once my background was dry, I layed the black zombie die cuts and once I was happy with the placement, I used some press n seal to pull my zombies up all together.  I flipped the press n seal over and used liquid glue to attach all the zombie together.  Then I covered the entire herd with liquid glue and flipped it over on top of my background.  Then I carefully removed the press and seal, which helped my place the zombie right where I wanted them.

Then I used some glue to attach my Woodland Forest Die Cuts on top of my zombie herd.  Next, I cut off any overhang.  For a sentiment I grabbed an older stamp set and stamped the Got Brains? with Raven Detail ink on a scrap of Perfect Blend Alcohol paper and used my trimmer to cut it down.

Finally, I used more liquid glue to attach my colored Zombie to the lower right corner of my card. Because of the dimension, I used an acrylic block to hold him in place until the glue dried.

Hugs and Kisses Challenge Card (Brutus Monroe)

 This month's CYOEchallenge on the Brutus Monore Fan Club Page is: Break out your sparkles and lets make some fun cards.  I started off...