Showing posts with label Interactive Card. Show all posts

Monday, October 26, 2020

Coffee Helps! Stamp of the Month- Interactive Card


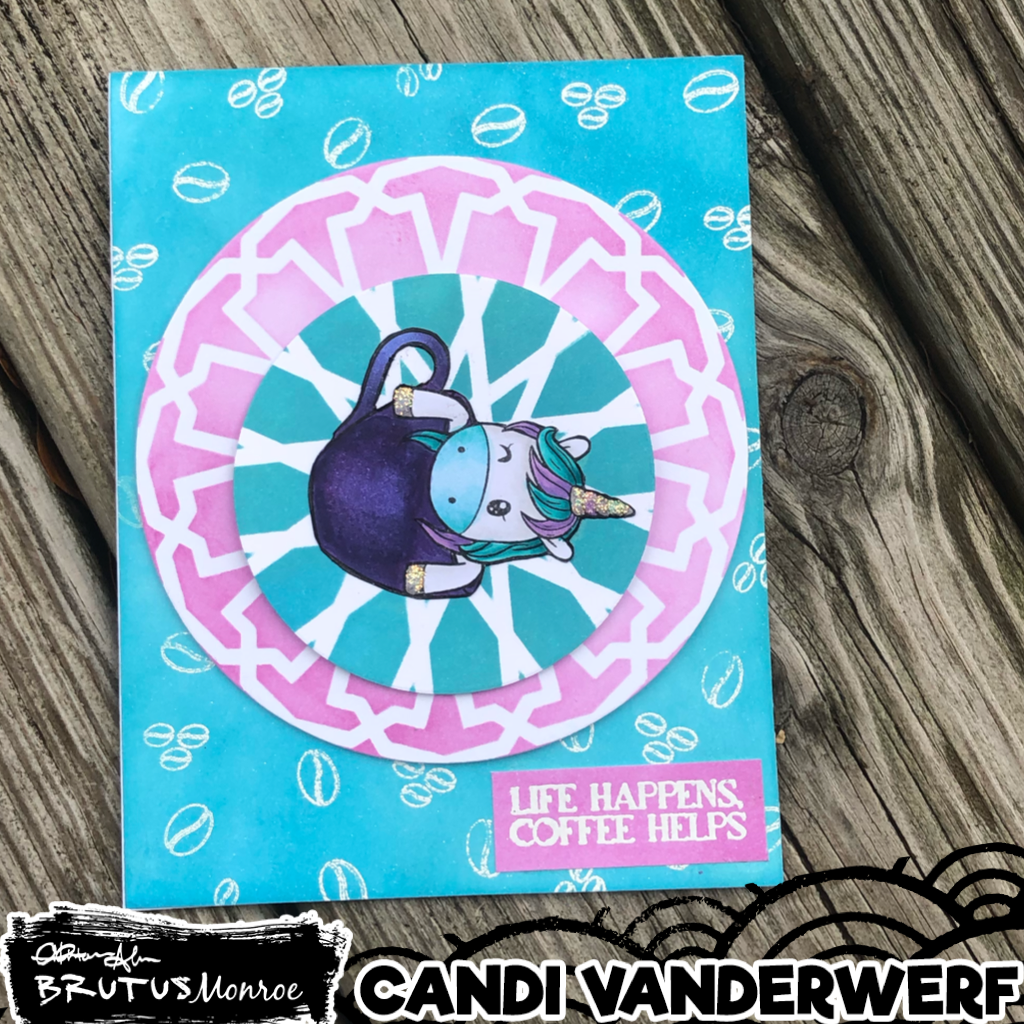
 Today's card is a fun one I think.  It features the stamp of the month from Brutus Monroe and it is this adorable Unicorn in a coffee cup.  I thought it would be fun to make a card that is represented by how I feel both when I do not start my day with Coffee and when I have had too much coffee.

This is a spinner card.  The Unicorn is affixed to the blue circle but that is loose and can wiggle and rotate/spin in a circle.  Here is a quick video of the card in action (its a little wonky since I was filming one handed).


I started by stamping the Unicorn stamp on some Perfect Blend paper with Raven Detail ink and coloring it in with Copic Markers and then fussy cut it out, including carefully in the handle of the cup.  I used a black marker to "edge" the cut out so to mask any imperfections in my cutting.

Next I took the Mixed Media Stencil - Gill and temporarily affixed it to my white card stock with Pixie Spray and using blender brushes and Simon Hurley's Triple Berry ink.  I then used the 2nd largest of the Circle Foundation Dies to cut out the inked background.   I cleaned off my stencil and then attached it to another white piece and used some blue ink from my stash to ink it up again and then used the 2.75" circle from same dies and cut out this panel.  I wanted the panels to "match" but when spins it gets all messed up like the circles had too much caffeine or needs some coffee to function.   

I used liquid glue to attached the Unicorn to the front of the blue circle.  I decided before I would play with the mechanism to make it spin, I would create my background. I took the coffee beans from the stamp set and after using my embossing bag over the entire white A2 panel, I stamped them in random spots with the Brutus Monroe Embossing Ink and covered them with Alabaster Embossing Powder.  After I heat set the powder, I used the same blue ink from before to ink my panel concentrating on the areas that will show.  Then I wiped off the excess ink that was on top of my embossed coffee beans, with a soft cloth.

The spinning mechanism is a little hard to explain.  Basically, I attached a foam square to both sides of a plastic bingo piece and then attached one side to the back of my blue circle (with the unicorn-the item I want to spin).  I then used .75" circle to cut the center out of my pink stenciled background.  I placed the bingo chip in the cutout and attached it to another circle (this time cut out of the 1.75" die).  This attaches my two circles together and my front one can wiggle and spin freely.  I used foam dots around the back of the pink stenciled circle, being careful to keep them away from the white circle that is attached to bingo piece.  I then affixed the whole thing to the front of my coffee bean panel.  I used liquid glue to attach the whole thing to my A2 card base.  Lastly, I ink blended a small white piece of scrap card stock with the same Triple Berry Ink and let it dry for a bit.  Once the ink was set I stamped the sentiment with the same Embossing Ink and Powder.  I heat set it and cut it down to attach to the bottom corner of my card.

Thank you for stopping by and have a great week.


Products used are listed below (affiliated links -no cost to you but they help support my page.) are from Brutus Monroe unless otherwise listed:

Monday, October 5, 2020

Peek A Boo Card using Brutus Monroe Products

 Happy Monday!  This week the Brutus Monroe Design Team focused on making a Child Friendly project.  Today I made a peek a boo card using Jennifer McGuire's method.  You can watch how she assembled it here.  I am excited to send this card to my niece, and now I need to make a fun card for her brother too.

I used a variety of Brutus Monroe products and a couple of items from my stash to make this card.  The first thing I did was to stamp out a bunch of the pumpkins from Pumpkin Faces stamp set  (with Raven Detail Ink and my Misti) on alcohol marker friendly paper, Brutus Monroe's Perfect Blend Cardstock.  It blends Copic and inks beautifully.  Next, I cut all three of the card bases while following Jennifer's instructions.  The front piece is 4-1/4" x 8-1/4" scored at 2-3/4." The back piece is 4-1/4" x 5-3/4" scored at 5-1/2." The inside piece is 4-1/4" x 8-1/2" scored at 4-1/4." I then folded and re enforced each score line with a bone folder.

Next, I used fourth smallest Circle Foundation Die to cut out my circles in the front and folded inside piece making sure they would line up properly when assembled.  I cut out two pieces of patterned paper from the Pumpkin Spice Collection Paper Pad.  The polkadot piece covered the inside of my card and I had to cut out the circle to match as well.  The zigzag "stripe" piece is 2" wide and since it is on the front of my card and it overlapped my opening, I needed to cut a small piece out it to fit over the opening with the same circle die.

I used several Copic markers to color all of my pumpkins in a orange, white and green, fussy cut them out with my Brutus Monroe Scissors and used my memento marker to go over the edges of all my cut out images.  I also had stamped out one pumpkin separately and used the next size up of the Circle Foundation Dies to cut it out.  I also used that same die to cut a piece of orange paper (from my scrap paper bin).  For my card front I chose a brown piece of paper (also from my scrap bin) and ran it through my big shot with a leaf embossing folder.  Then, I cut out the portion that would cover my circle cut out and used liquid glue to attach it and my 2" patterned paper piece to my card base, lining up my circle openings. 

I lined up my stamped and colored pumpkins on the front of my card and once they were where I liked them, I glued them down with liquid glue.  Next, I chose the pumpkin I wanted to show on the peek a boo element, and using the Brutus Monroe Embossing Ink, I stamped a jack o lantern face on the pumpkin, sprinkled it with Raven Sparkle Embossing Powder and melted it with my heat tool.  I also colored the pumpkin (that I left on the die cut circle) with Copics and chose a green to color around the pumpkin.

I assembled the card via Jennifer's Instructions, (please click here if you want to see how). Her video also shows how to attached the pumpkin in the circle which is the image you see when you have the card closed.  I attached the smiling jack o lantern to the peek a boo piece.  Finally, I stamped my sentiment on a matching piece of brown card stock.  The sentiment came from Whistling Windmills and says "You make me smile" and attached it to the inside of my card.


Here is the inside peek a boo card with the Jack O Lantern face showing.


Here is a quick clip of how the card looks when closed and open.


Hugs and Kisses Challenge Card (Brutus Monroe)

 This month's CYOEchallenge on the Brutus Monore Fan Club Page is: Break out your sparkles and lets make some fun cards.  I started off...