Showing posts with label Dies. Show all posts

Wednesday, November 9, 2022

Rainbow Swirl Stencil Christmas Card


Today I bringing you a Christmas Card featuring the Rainbow Spiral Stencil. I used 4 Simon Hurley Create. Inks.  Two Reds (Love Struck and Game Over) and two greens (Overzealous and Fake Plant).  I started with Love Struck and blended the first stripe.  After I wiped the excess ink off the stencil, I used the lines on the stencil to line up my spiral and then blended with Game Over. I wiped the stencil off again, relined it up with Overzealous and then repeated with Fake Plant.

Continuing to wipe off my stencil between inks, I completed the spiral alternating back and fourth between the red and green inks until my circle was complete.  Next I used some watered down Pearl Aqua Pigment and a paint brush to cover the entire blended area.  This gives the spiral lots of shimmer and shine.

I trimmed the panel to 4" x 5.25" with my paper cutter. Using my scissors, I trimmed out the spiral around the outside and used a circle die to cut out the center.  I adhered the Spiral to and A2 Top folding Card base, lining up the spiral edge with the right edge of my card base. 
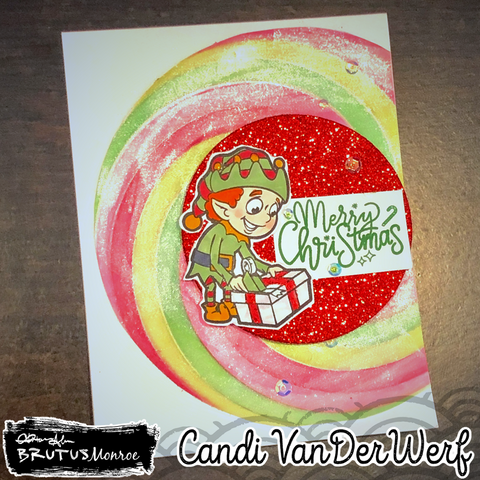
Next, I used another circle die to cut some Red Glitterstock for the center of my spiral.  I adhered this with some foam tape.  For a focal point, I stamped one of the elves from Crafty Elves with Raven Detail Ink on Perfect Blend Alcohol paper and colored him in with Copic markers.  After I fussy cut him out, I added some shimmer to the yellow on his outfit and to the red ribbon on the package (also with some watered down Pearl Aqua Pigment).

For my sentiment, I stamped the Merry Christmas from the Snowflake Swirl stamp set with Fake Plant and trimmed it down.  I adhered both my sentiment and elf to the center of the Glitterstock circle with liquid glue.

Finally, I added just a touch of more sparkle with some sequins from my stash.

Here is the video I made to go with this card:


Affiliate Links:

Rainbow Spiral Stencil: https://shrsl.com/3s8j2

Perfect Blend Paper: https://shrsl.com/3s8k8

Pearl Aqua Pigment: https://shrsl.com/3s8jt

Crafty Elves Stamps: https://shrsl.com/3s8jw

Crafty Elves Coordinating Dies: https://shrsl.com/3s8k4

Glitter Stock: https://shrsl.com/3s8k5

Circle Foundation Dies: https://shrsl.com/3s8lm

Raven Detail Ink: https://shrsl.com/3s8k9

Top Folding A2 Card Bases: https://shrsl.com/3s8ka

Simon Hurley Create. Love Struck Ink: https://shrsl.com/3s8kc

Simon Hurley Create. Game Over Ink: https://shrsl.com/3s8ke

Simon Hurley Create. Overzealous Ink: https://shrsl.com/3s8kg

Simon Hurley Create. Fake Plant Ink: https://shrsl.com/3s8kh

Copic Colors:

E000, R20 (Face and cheeks) Green: G28, YG63 Red: R37, R39 Gold: YR24 (belt buckle) Orange: YR09 (hair) Black: C6 (belt)


Wednesday, August 10, 2022

Brutus Monroe You Brighten My Day Rainbow Card

 Brighten My Day Card

I love foiling and today I thought I would share a card that had a focal panel with some of Brutus Monroe Toner Mixable sheets.  I started by foiling my Rainbow panel from the Really Radiant Toner Mixables pack with some Deco Foil Transfer Sheets in Rainbow. Then, I cut the panel and a black mat down with a stitched frame from my stash and adhered them together.

Next, I stamped out my sentiment form the Dogwood Spring Stamp set with Distress Oxide Villainous Potion ink and covered it with Icicle Embossing Powder.  After heat setting, I used the coordinating die to cut it out and matted it on a black frame cut from a stitched die from my stash.  

For some interest, I cut some vellum with the leaves from the Fabulous Florals Die set (3 times) and sprayed them with some shimmer spray to add some shine.  I also sprayed the back of leaves with some Pixie Spray to add adhesive to the back and layered them on the front of my foiled panel.  I used liquid glue to attach my matted sentiment over the ends of my leaves so help keep them in place.  Finally, I adhered the entire thing to a white A2 card base.

Thanks for stopping by and brightening my day.  ðŸ˜†  All of the above links are affiliate links to the Brutus Monroe store. These add no cost to you, however they do help me bring you content.

GIU Day 3 Mini Slim Halloween Card


For GIU Day 3 I have a Mini Slim Line card for you.  Mini Slims are one of my favorite to create.  I started by stamping the jack-o-lantern image from the Unity Stamp Co. Hallows' Eve Tree all over the front of my 3.5" x 6.25" panel with Black pigment ink.  I covered the Black Pigment Ink with Clear embossing powder to heat set it. 

Next, I used Carved Pumpkin Distress Oxide ink over the entire panel, and a little Black Soot Oxide ink over the edges.  Then I took a script stamp from the SMAK Kit Happy Little Moments (July 2015) and stamped it randomly over the entire panel with White Pigment Ink and set it aside for a bit to dry.

While I waited for the White ink to dry and fade back a bit.  I took some Orange Chroma Glaze from Brutus Monroe and spread it on a piece of packaging that I took out of the recycling and set it aside to dry as well.

Once the Chroma glaze was dry (about an hour depending on thickness), I used an older Spellbinders die to cut the pumpkin from it.    Next.  I cut my panel down to about 3" x 6" panel and wrapped a piece of black tulle around the bottom third of my panel using strong double stick tap to secure it to the back.  I took a smaller piece of tulle to tie a knot on the left and a glue dot to attach my pumpkin to the knot.  

Next, I layered the panel on a piece of black cardstock and then lined it up in my Misti to stamp my sentiment; using the same black pigment ink and clear embossing powder as my jack-o-lantern banner.  Finally, I attached the whole thing to my white card base that measures 3.25" x 6.25."


Wednesday, June 15, 2022

You're My Favorite Dad (Brutus Monroe June 2022 Stencil of the month)


Since Father's Day is this weekend, I thought I would show you the card I made for my dad.  Sometimes its hard to know what to use for a masculine card and my go-to is usually a brown and a blue color.

I started with the June 2022 Stencil of the month Groovy Grid.  Using my Stick and Stamp Mat and coordinating Blending Buddy, I placed my 4.25" x 5.25" white card panel in the middle, with the stencil on top.  I used my blending tools to add Simon Hurley Creates Grrr! and Clear Skies inks in a random panel over the stencil.

Then I cut the panel and a brown mat with some stitched rectangle dies from my stash.  I cut the dad from the center of my brown mat (since it will be covered by my panel).  

Next I cut out two of the smaller and one of the larger leaves from the Fabulous Florals set and ink blended some Clear Skies ink over them. I just used what was left on my brushes and did a light coat so that some of the white cardstock showed through as well.

For my companion sentiment, I stamped the You're my Favorite (from Super Sentimental) in Clear Skies in and cut it out with a stitched die from my stash.  To soften the white of the circle, I lightly blended some of the leftover Grrr! ink from my brush around the edges and along the edges of my dad letters (cut from an alphabet set in my stash).

After I matted the card panel and mat to my Precut A2 Card base, I used the Dad letters to line up my circle sentiment and leaves.  Finally, I added my DAD over the top of the leaves and just overlapping the bottom of my companion sentiment a bit.

Here is a look at my card one more time:

Thanks for joining me today.  Have a fabulous rest of the week and remember to create something everyday!  


Saturday, October 23, 2021

Brutus Monroe Oh My Gourd Aqua Pigment Shaker Card


I started with a piece of Black Watercolor paper and some White and Pearl Aqua Pigments on my glass mat.  I sprayed the Aqua Pigments with a little water and then pressed my watercolor paper into it.  I kept ink smooshing my paper and drying in between until I was happy with my pattern.  Next I used the Oh my Gourd die and ran my panel through my die cut machine, keeping the negative for my card and putting the die cut aside for now.

Then, I cut about 6 -8 more of the negative panels with the die from white scrap cardstock and glued them all together.  I used some strong double sided tape to the back of my black die cut panel and attached a piece of acetate to the panel.  Then I used more strong double sided tape to the front stacked white die cut pieces.   I flipped over the stacked panels with the negative or frame.  I temporarily placed the Oh my Gourd die cut into the center of the negative stacked piece. After spreading liquid glue all over the Oh my Gourd die cut piece and carefully lined up my A2 Card base on top.  After gently flipping it over, I removed the negative/frame piece and pressed the Oh my Gourd die cut piece in place.  


Then I added some glitter and sequins to the center of my card panel, right in the center of the Gourd.  Then I added more double stick tape and some liquid glue to the negative/frame piece.  I attached it to the front of my  card base creating a shaker card.  Then I took a piece of white cardstock and stamped the hell Gourd-Geous sentiment with Raven Detail ink and cut it out with a banner die.  I attached the sentiment to the front of the panel to finish the card.

Here is a list of the products used that are available in the Brutus Monroe store, like always these affliated links do not cost you anything extra, however they help support me to bring you new content.

Wednesday, October 20, 2021

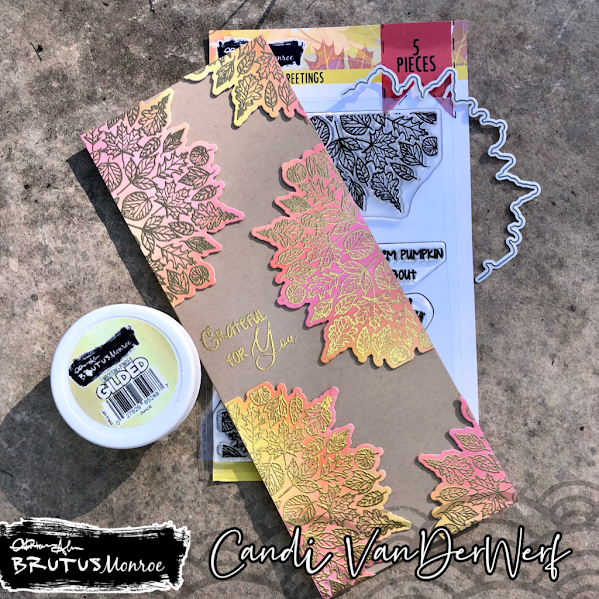
Brutus Monroe Grateful For You Slim Line Card


I started by taking Bee Sting, Sike! and Slippery When Wet inks from Simon Hurley Creates and blended up a couple of white card panels.  Then I used my antistatic bag to treat the front of the panels, lined them up (individually) in my Original Misti and stamped both of the leaf images from Grateful Greetings with Brutus Monroe Embossing Ink.  I covered the ink with Gilded Embossing Powder and heat set it.  (I repeated this until I had 6 embossed images--I only needed 5).


Next I cut out each of the Embossed panels with the coordinating die, and trimmed the end off with my paper trimmer.  I also cut out 10 pieces of the die cut with Kraft paper.  I stacked two of each die cut together with liquid glue and attached one of my Inkblended/Embossed images on top.  This creates dimension for the front of my card.  I created my card base from some Kraft Colored cardstock.  I cut the 8.5" x 11" cardstock down to 8.5" x 7" and scored at 3.."  This creates a slim line card base that measures 8.5" x 3."


I chose my sentiment from the stamp set and used my die cuts for placement and then stamped it in Embossing Ink.  I also covered it with Gilded Embossing Powder and heat set it.  Then I used liquid glue to attach one of my Embossed Die cuts opposite of my sentiment.  Then I placed two of the Embossed Die cuts to the left side of my card base.  For my last two pieces, I attached them at an angle on the right side of my cardbase in each corner.  Finally, I used my paper trimmer to cut off an overhanging piece of die cuts.

Here are (affliated) links to the products used in the Brutus Monroe Store-as always affilated links do not cost you anything extra, they just help me bring you new content.)


Sunday, October 17, 2021

Brutus Monroe Spooky Kids (6 cards)


Today I have 6 cards to share with you from the Spooky Kids Stamps and Coordinating Die set from Brutus Monroe.  Each card also features a different stencil and glaze also from Brutus Monroe. 


VAMPIRE

I started with Raven Cover Cardstock cut down to 4.25" x 5.5". I used some low tack tape to attach the Batty Stencil to my cardstock.  Using a silicone spatula, I spread some of the Night Sky Velveteen Glaze in the upper corner of the stencil and covered just part of it.  I only wanted a small pattern of the bats for this card.  I set the panel aside to dry.  Once it was dry I used the second largest Rectangle Foundation die to cut it out.  I used another Rectangle die from my stash to cut out a mat layer from Scarlet Cover Cardstock.  I used my embossing bag to treat the Scarlet cardstock and stamped the sentiment from Spooky Sentiments with Brutus Monroe Embossing Ink, in the center.  I covered the sticky ink with Raven Embossing Powder and heat set it.  I used a banner die from my stash to cut out the sentiment.   (Using the middle of the mat paper for my sentiment saves on paper and once I mat the Black card panel on the top, no one will ever know that I cut out a piece from the Scarlet mat.)  I stamped the Vampire from the Spooky Kids stamp set with Raven Detail ink on some Perfect Blend Alcohol Paper.  Then I colored him in with a variety of Copic markers and cut him out with the Coordinating Die.  I used liquid glue to put my card panel together with the Image, sentiment and mat.  My cardbase is made from Raven Cardstock and is standard A2 size.  For the inside of the card, I placed another piece of Scarlet cardstock, and stamped a Happy Halloween sentiment with Raven detail ink.


GHOST
I started with Raven Cover Cardstock cut down to 4.25" x 5.5". I used some low tack tape to attach the Hoiden Stencil to my cardstock. I carefully covered just the stencil with Glow in the Dark Chromas Glaze, making sure not to go outside the edges of the stencil (this is a circular stencil). I set this panel aside to dry.  Once it was dry I cut it with the second largest Rectangle Fondation Die and my mat was cut with a large Rectangle die from my stash and a green piece of paper from my scrap bin.  I used my powder tool on the green mat and stamped the sentiment from Spooky kids with Brutus Monroe Embossing ink.  After covering with Raven Embossing Powder, I heat set it and cut it out with a rectangle die.  I stamped the Ghost from Spooky Kids with Raven Detail ink on Perfect Blend Alcohol Paper and colored him in with Copic markers. After I used the coordinating die to cut him out, I used liquid glue to attach my sentiment and image to the front of my panel.  Then I attached the panel to the green amat.  To finish my card,  I chose a white A2 Card base and used liquid glue to attach my matted panel.


ZOMBIE
 I started with Raven Cover Cardstock cut down to 4.25" x 5.5". I used some low tack tape to attach the Slim Line Ripple Stencil to my cardstock at an angle. I covered the edges of my stencil with low tack tape to protect the card panel. Using a Silicone spatula, I spread some Lima Bean Velveteen Glaze across the entire stencil.  (My mind saw this stencil as a brain pattern, which I thought would fit nicely with the zombie.) While the panel was drying, I stamped my image with Raven Detail ink on some Perfect Blend Alcohol Paper,colored it in with Copics, and cut it out with its coordinating die.  Next, I cut down a green piece of paper with a rectangle die from my stash.  I treated the paper with my embossing bag and after stamping my sentiment from Spooky Sentiments with Brutus Monroe Embossing Ink, I covered it with Raven Embossing powder, heat set it and cut it out with a die from my stash.  Once my panel was dry, I used the second largest of the Rectangle Foundation dies to cut it out and mat it on my Green piece.  I used liquid glue to attach my zombie and sentiment to the front of my stenciled panel.  I attached the entire thing to a Raven A2 card base.  Inside I included another piece of green paper with a Happy Halloween Sentiment stamped on it.


WITCH
Taking a piece of white cardstock I attached the Random Dots Stencil with low tack tape.  I took some Marmalade and Amethyst Glitter Glaze and spread each color on a different side.  Then I carefully combined the colors in the middle.  I set the panel aside to dry and worked on my image.  The Spooky Kids witch was stamped on Perfect Blend Alcohol paper with Raven Detail ink and colored in with Copic markers.  I used the Coordinating die to cut her out.  Next, I looked through my scrap bin and found a light purple piece of patterned paper and cut it out with a rectangle die from my stash.  I cut a circle out of the center of the purple panel.  After treating the circle with my embossing bag, I stamped the sentiment from the set with Embossing Ink and covered it with Alabaster Embossing powder.  After heat setting it, I attached it to the front of my card panel along with my colored witch with liquid glue.  Then I glued the panel to my purple mat and then glued the whole thing to the front of my landscaped A2 white card base.


FRANKIE
I started with Raven Cover Cardstock cut down to 4.25" x 5.5". I used some low tack tape to attach the Slim Line Pathway Stencil to my cardstock. I covered the right edge of my card panel with low tack tape to protect it from my glaze.  I used a silicone spatula to spread the Purple Galaxy Glaze over the stencil.  Once I removed the stencil, I sprinkled some Fallen Snow Glitter over parts of the wet glaze for some sparkle and set the panel aside to dry. Next, I stamped the zombie image on some Perfect Blend Alcohol Paper with Raven Detail ink, I colored it in with Copic markers and cut it out with the coordinating die.  Using a scrap piece of purple paper cut down with a Rectangle die from my stash, I stamped my sentiment from the set with Embossing ink.  I sprinkled it with Alabaster Embossing Powder and heat set it.  Then I used a rectangle die to cut it out of the center of my mat.  Once.my Galaxy glaze panel was dry, I used the second largest Rectangle Foundation die to trim it down and attach it to my purple mat.  I used liquid glue to attach my sentiment and Frankie to the front of my panel.  Then I attached the entire thing to a white A2 card base.


PUMPKIN
I started with a piece of white cardstock cut down to 4.25" x 5.5". I used some low tack tape to attach the Kramer Stencil to my cardstock.  I used a silicone spatula to spread some Lima Bean Velveteen Glaze over the entire panel and then set it aside to dry.  One it was dry, I cut it out with the second largest Rectangle Foundation die.  I matted the panel on a piece of orange with white polkadot paper from my scrap bin.  This patterned paper was cut down to a mat side with another rectangle die from my stash.  Before I attached the panel to the patterned paper, I cut out a rectangle from the center with a die from my stash.  I treated this rectangle with my antistatic bag and stamped my sentiment with Brutus Monroe Embossing Ink.  I covered the ink with Raven Embossing Powder and heat set it.  I attached the Pumpkin girl and sentiment to the front of my matted Velveteen panel with liquid glue.  Then I attached the entire thing to my white A2 card base.


List of Products Used (available in the Brutus Monroe Store):  Affliated links are not at any additional cost to you, however, they help support me to bring you new content.

Monday, March 15, 2021

Brutus Monroe Stencil of the Month March 2021


Today's card has no stamping.  This month's stencil of the Month from Brutus Monroe is a slim line stencil called Multi Ring.  My first step was to choose some patterned paper to cut out the tag for the front of my card.  This is a paper from the Farmhouse Florals 6x6 collection.

I compared my pink inks from my stash the pink in the roses and blended them both over the Multi Ring stencil (with pixie spray) temporarily attached my 8.5 x 3.75 white slim line card base with a blending brush.  Next, I dug through my leftover stash from Brutus Monroe Inspiration boxes and found a ribbon that also coordinated with the flowers and attached it to the bottom of my die cut tag with Easy Tear Tape in the 1/4" size.  I also threaded the top of the tag with more of the ribbon.

I attached the tag to the front of my card with some foam tape and then looked through my scrap stash for matching cardstocks to cut out my roses, leaves and sentiment.  I used the Rose Corner Die in a yellow, pink and orangey/red paper.  I fussy cut one rose out of the die cut and attached them to a darker scrap cardstock for the "back petals".  I also fussy cut around the scrap so I had two tone roses.  I repeated this process with two green scraps and a leaf die from the Flowered Heart Die set.  I attached all of the roses and leaves to the top of the tag on my card with liquid glue.

Finally, I used the same pink scraps to cut the word Hugs and its shadow die from Christopher's Sentiment Cutting Dies.  I did use my blender brush and the darker of my two pinks to give the shadow layer a little tint.  I used liquid glue to attach the sentiment together and then to the front of my card near the bottom of my tag.

Here is a list of affilated links to the products I used that can be found in the Brutus Monroe Store:


Monday, February 15, 2021

Valentine Cards with Brutus Monore


For my card today, I started by placing some media paste on two different piles on my glass mat and I mixed in Cherry Aqua Pigment into one pile and Fuschia into another pile and mixed them until I got the colors I wanted.  Next, I took a piece of paper and smooshed it into the two different colored paste until I was happy.  (I didn't leave any behind. I made several backgrounds with as much paste as there was left on my mat until it was all gone.) Then I left the backgrounds to dry overnight and cleaned up the left over residue from my mat, palette knife.

I ran my dried background with a stitched rectangle die from my stash.  Next I ran some red scrap paper through my Big Shot twice with one of the border dies from Lace Borders Cutting Die Set.  I also cut one layer from Prom Night Glamour Gloss Cardstock and glued them all together to create a thick die for texture.  I also did the same thing to the Love die from With Love and White cardstock three times.  I attached both stacked die cuts to the front of my card panel.  I used liquid glue to attach my card panel to a pink A2 card base.  To finish off my card, I used a small heart die from my stash to cut more hearts from leftovers of my Prom Night Glamour Gloss and glued them around my die sentiment.

For this project I started with an aqua pigment smooshed background.  Then I used the Flower Burst Stencil and an ink blending tool to pounce the Alabaster Pigment ink all over the front of my panel.  I set it aside to dry and in the meantime I cut a heart makeshift stencil from acetate with a die from my stash.  Once the inked panel was dry, I used a palette knife to spread the Bubble Gum Chroma Glaze and Some Happy Heather Velveteen glaze over the center of my card panel (through my makeshift stencil).  I scooped a little of each glaze onto my Stencil pal and then spread them together to create a mix.  Before the glaze was completely dry I pressed my Glamour Gloss Prom Night Heart from the Heart Petals Die Cut into the center of the heart and put the whole thing aside to dry overnight.

Once my panel was completely dry, I put it in my spatter blox and splattered both white acrylic paint and Aubergine Surface spray over it for some more pattern.  I cut the panel down with a stitched rectangle die from my stash and attached it to an A2 white card panel.  I used some white cardstock and cut out three of the Love word die from With Love die set and stacked them together with liquid glue.  I attached the stacked die to the front of my card along with a few white small hearts.

Did you make any valentines this year?  What is your favorite die or stamp set to use for Valentines?

Friday, January 1, 2021

2020 Growing In Unity Week Post #5

Happy New Year!  Welcome to 2021!  Best of wishes for everyone this year!

For my last post I had to create a Slim Line Card.  I stamped out a variety of Angie Girls with Copic friendly ink and colored them in with a very limited Christmas Color pallet.  Next, I looked through my dies and found a rectangle and rectangle frame set to cut out the images and framed each one with a evergreen die cut frame.  I like how this looked because they look like snapshots and one of the Angie girls is holding a camera, so I imagine this is a fun day with the girls and we are getting three glimpses into their party. (I used girls from Ember Girl, Planner Gal: Merry Doe, Planner Gal Kit: Tell Me A Story.)


Next, I looked through my pile of patterned paper, (we all have a stash we never use right or is it just me?) to find a red plaid paper and cut it down to just shy of 3.5" x 8.5" panel.  I used the camera stamp from Free Your Dream May 2017 Kit of the month with black ink all over the panel, varying the image for interest.  

You know what comes next right, I used the half Doily stamp from the Happy Little Moment Smak Kit (July 2015) at the top and bottom of my panel using the same method as I mention earlier this week.  I used my Misti and a Ranger Blending Tool with a Circle Foam and Deco Foil Transfer Gel as ink on my stamp.  I also did this for the polka dot stamp (used at an angle on the top and bottom of my panel opposite of the doily). (Polka Dot stamp from Love Life As It Is set).

I set my panel aside to dry (about 30 mins or so).  In the meantime, I used the sentiment from Ember Girl with embossing ink on a piece of vellum and then heat set some Black Embossing Powder and cut out the sentiment with a circle die.


Once my background panel was dry, I cover the two doily image with Green Foil and the polkadots wtih Opal Foil (both from Deco Foil/Thermoweb) and then ran it through my laminator twice.  I peeled back the foil and Voila!  I attached my three Angie Girls at angles down my panel and glue the panel down to my white slim line cardbase.  I then affixed my sentiment.  Finally, for some more glitz, I used Diamond Stickles to all the accents on the Angie Girl images.

Do you have a favorite project from me this week? Do you have a favorite Angie Girl?  Let me know below.  

List of supplies


Tuesday, December 8, 2020

Snow Scenes Stamp and Die Combo From Brutus Monroe


Stamp and Die combo what??? yes, you read that right.  Now available at Brutus Monroe is the beautiful Snow Scenes Stamp and Die combo.  This stamp set is so beautiful.  It has three snowflakes that have a center with a different winter scene.  One is a peaceful river scene, one is the forest scene, and the other is cozy cabin scene.  The last snowflake has an open center that is perfect for a sentiment or pattern paper or one of the small snowflake stamps that also come with the set.  The dies match each of the large snowflakes and there is a circle die that cuts out the center of the snowflakes.  This stamp set is also available with the December Inspiration Box-Winter Winds, which you can order here.

When I received this set, I decided right away that I wanted to make a rainbow snowflake card.  I used the three scene snowflakes and stamped them out in rainbow order. First I took the Forest Scene and stamped it in Bee sting and Guppy Ink.  I quickly covered my inked images with Brutus Monroe Icicle Embossing Powder and heat set them.  I used Slipper When Wet and Later Gator Inks with the Cabin Snowflake set and repeated the same steps as above.  Finally I used Clear Skies and Triple Berry for the River scene and again heat set the Icicle embossing powder over the stamps images.

Here is a closeup so you can see the shine that the embossing powder gives the ink.

Using the coordinating dies, I quick cut out each of the snowflakes.  To cut the centers of my snowflakes, I decided to use a bigger die from the Circle Foundation die set than the one that came with stamp set only because I wanted to go on the outside of the circles to give them that definite border.  I popped up the centers with foam squares keeping to the rainbow order.

Next I pulled a precut slim line panel and used some low tack tape to attach the Simple Slim Line Stencil Dressing Screen.  This time I only used three inks: Bee Sting, Slippery When Wet and Clear Skies.  I used my blending tools to blend the inks to make a rainbow.  When I do this, I start with my lightest, in this case the Slippery When Wet yellow, and blended in the middle up toward the top and slightly towards the bottom.  Next, I used Bee Sting at the top and blended over the Slipper When Wet to create and orange color.  I also blended some Bee Sting at the very bottom.  Finally, I used Clear Skies in the remaining white portion of my panel and blended up over some of the yellow and down over the red at the bottom.I like using a three color blend to make my rainbows instead of using all six colors. I find the blend to be more cohesive and smooth when combined them to make the orange, green and purple.  Because the Dressing Screen stencil is smaller than a standard Slim Line Stencil, I made sure to blend the board at the top and bottom giving me that rainbow effect as well.  Before I removed my stencil I quickly sprayed the whole panel with a shimmer spray from my stash for some sparkle and shine.

I trimmed down my rainbow panel slightly and attached it to my card.  Now full disclosure, I meant to make a landscape card, however, I attached my panel backwards so the rainbow started with purple, so I had to adapt.  No worries I just flipped the card to portrait and moved on.  I attached the snowflakes from the top to the bottom with liquid glue in of course rainbow order.  Lastly, I put my whole card base in my Original Misti and stamped my sentiment from the set with Raven Detail in.

Thank you for stopping by.  Here is a list of affiliated links to the Brutus Monroe store for products that I used on this card. (Affiliated links are at no additional cost for you, they just help to support my content and blog.)


Hugs and Kisses Challenge Card (Brutus Monroe)

 This month's CYOEchallenge on the Brutus Monore Fan Club Page is: Break out your sparkles and lets make some fun cards.  I started off...