Showing posts with label Angie Girl. Show all posts

Friday, May 26, 2023

GIU Day 5--Last Day

 It's my last day for the Growing in Unity Week.  This week just flew by.  I hope you have enjoyed my cards as much as I did making them.  

Today I have another Slim line card.  It was inspired by my guy.  He is the best and he is my biggest fan and supporter (maybe even more than my mom! ) 😲  Shh don't tell her!


I did another watercolor card as I am having fun practicing my skills.  This time, I made my background with the Hit the Bricks background stamp.  Heat embossing clear embossing powder over Black Pigment ink.  I only stamped it part at the top and bottom as I knew the middle would be covered.

To color it, I sprayed the whole thing with a ton of water.  Then I added liquid water color to the top in random areas.  I used a red and brown color.  I sprayed it again with water to get the pigments moving and then twisted and turned it.  Then I smooshed it on my glass mat.  I used the left over to smoosh color on the bottom section.  After drying it with my heat tool, I did a bit more smooshing and then set it aside to dry completely.
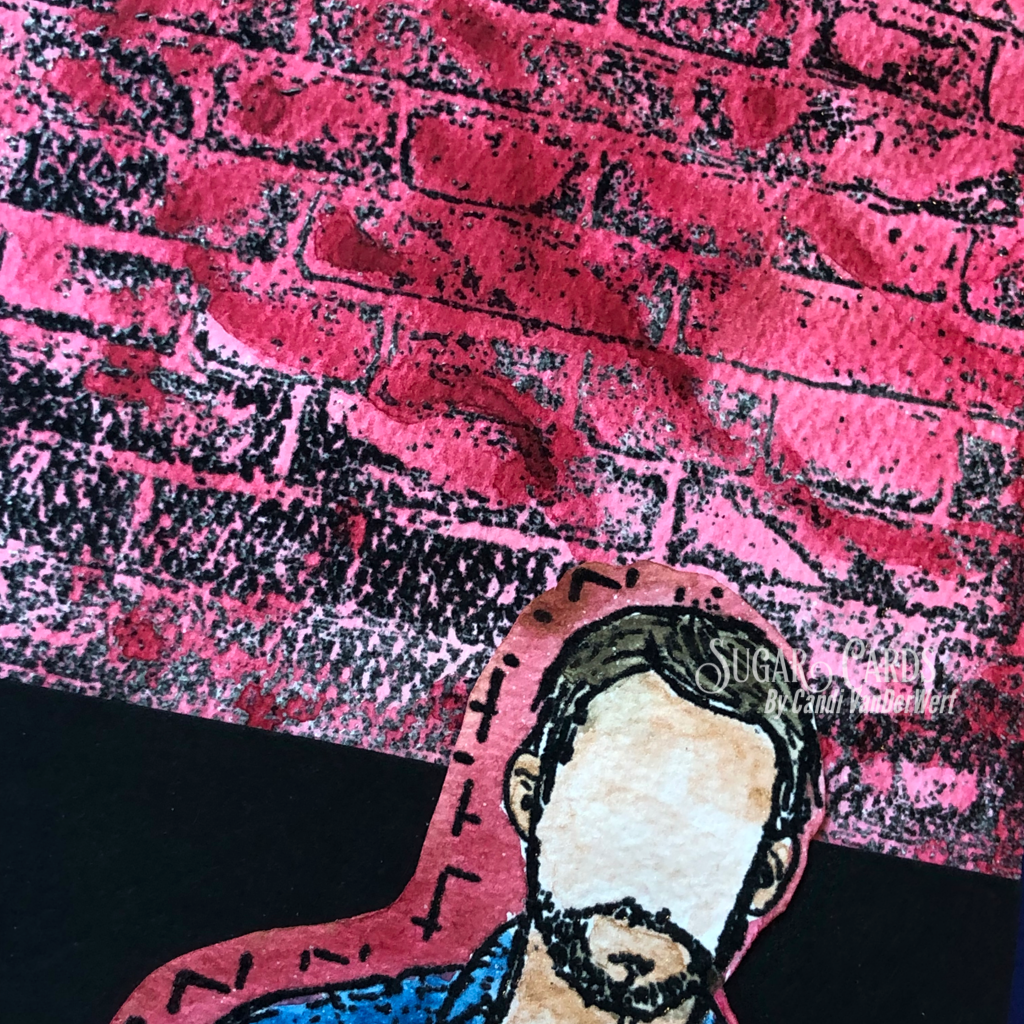


For my image, I used Forrest Guy and after heat setting the same ink and embossing powder, I painted him in with Aqua Pigments.  Then I fussy cut him out.  Added a bit of the same red and brown to the edges.
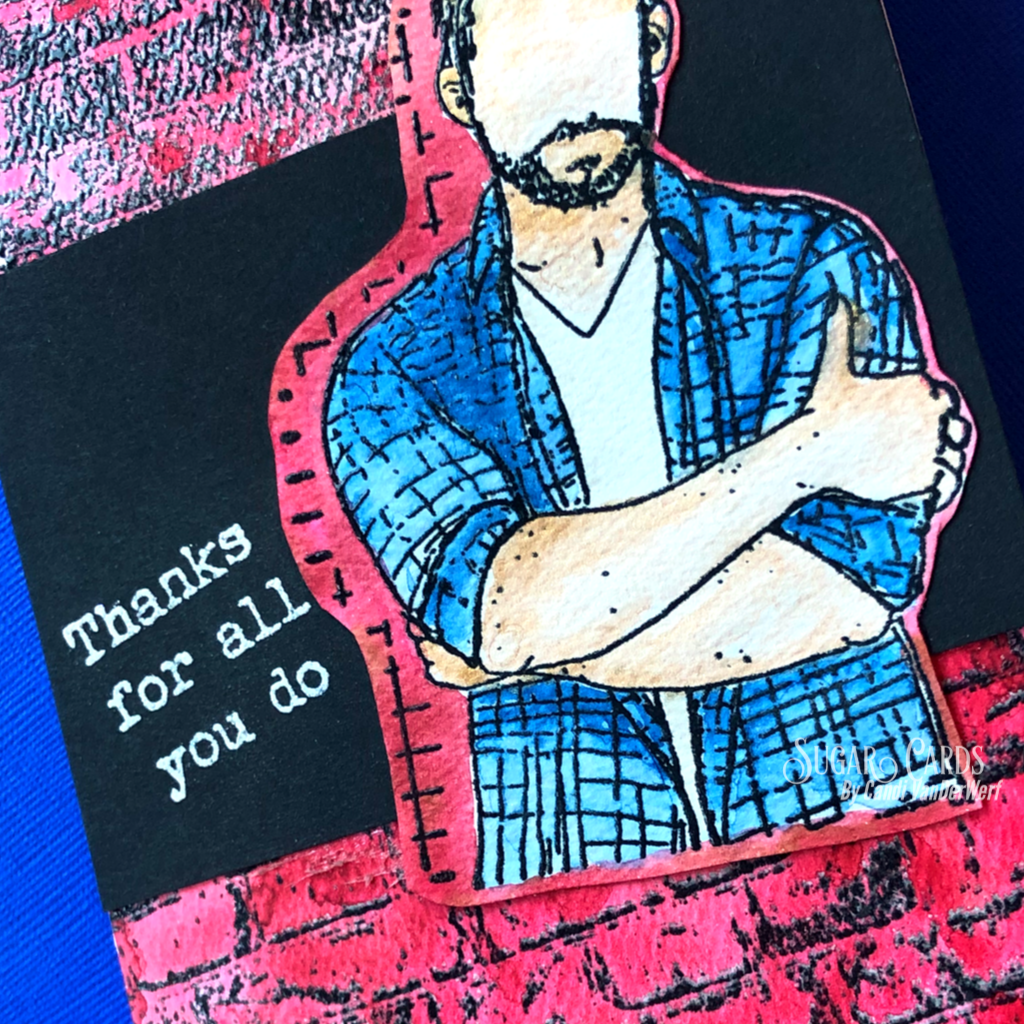


I stamped my sentiment with White Pigment ink and covered with white embossing powder on a scrap of black paper. (I find I get a cleaner and bright white look using White ink with white embossing powder.)  Then once everything was dry I attached it all together.

Thanks for stopping buy everyday.  Please remember to leave a comment here so I can enter you in the giveaway.  As usual you can find my supply list (with affiliate links noted) below.  If you would like to see more content from me you can find me on Social media as Sugar Cards.  Links to all are on the right of page.  Have a great and safe Memorial Day weekend!


Supplies Used:

Thursday, May 25, 2023

GIU Day 4

 I can't believe it is Day 4 already.  Today I stepped out of my comfort zone to bring you a water colored image.  Water coloring images is one of my goals to get better at and I am feeling a little more confident in it.


I LOVE ANGIE GIRLS.  They are some of my favorite stamps of all time.  Today I featured Hannah!

I stamped her on some watercolor paper and then heat set the image with Clear Embossing ink.  I am most comfortable when I have that "edge" to my images when I watercolor.  I took my time and did a variety of colors (I will list them below).

For the background around her, I flooded the background with water and then just dropped in my color,  letting it flow itself.  Once my panel was dry, I carefully tore around the edges so that I could get that distressed look.  (I debated about adding watercolor to those edges but in the end left them white.--Would you have painted them?)

I used a lot of liquid glue to attach it to my panel.  This panel is just painted with a mix of blue and shimmer paint.  After I added my sentiment, I out on a few gems for some added sparkle and matted it to my card base.

Do you water color at all?  Or does it terrify you like it does me?


List of Supplies (affiliate links will be noted):

Friday, January 1, 2021

2020 Growing In Unity Week Post #5

Happy New Year!  Welcome to 2021!  Best of wishes for everyone this year!

For my last post I had to create a Slim Line Card.  I stamped out a variety of Angie Girls with Copic friendly ink and colored them in with a very limited Christmas Color pallet.  Next, I looked through my dies and found a rectangle and rectangle frame set to cut out the images and framed each one with a evergreen die cut frame.  I like how this looked because they look like snapshots and one of the Angie girls is holding a camera, so I imagine this is a fun day with the girls and we are getting three glimpses into their party. (I used girls from Ember Girl, Planner Gal: Merry Doe, Planner Gal Kit: Tell Me A Story.)


Next, I looked through my pile of patterned paper, (we all have a stash we never use right or is it just me?) to find a red plaid paper and cut it down to just shy of 3.5" x 8.5" panel.  I used the camera stamp from Free Your Dream May 2017 Kit of the month with black ink all over the panel, varying the image for interest.  

You know what comes next right, I used the half Doily stamp from the Happy Little Moment Smak Kit (July 2015) at the top and bottom of my panel using the same method as I mention earlier this week.  I used my Misti and a Ranger Blending Tool with a Circle Foam and Deco Foil Transfer Gel as ink on my stamp.  I also did this for the polka dot stamp (used at an angle on the top and bottom of my panel opposite of the doily). (Polka Dot stamp from Love Life As It Is set).

I set my panel aside to dry (about 30 mins or so).  In the meantime, I used the sentiment from Ember Girl with embossing ink on a piece of vellum and then heat set some Black Embossing Powder and cut out the sentiment with a circle die.


Once my background panel was dry, I cover the two doily image with Green Foil and the polkadots wtih Opal Foil (both from Deco Foil/Thermoweb) and then ran it through my laminator twice.  I peeled back the foil and Voila!  I attached my three Angie Girls at angles down my panel and glue the panel down to my white slim line cardbase.  I then affixed my sentiment.  Finally, for some more glitz, I used Diamond Stickles to all the accents on the Angie Girl images.

Do you have a favorite project from me this week? Do you have a favorite Angie Girl?  Let me know below.  

List of supplies


Thursday, December 31, 2020

2020 Growing In Unity Week Post #4

I can't believe the week is almost over (and 2020).  I am going to end 2020 with another card featuring Diana Girl (from the Angie girls by Angie Blom).


I stared by stamping with a black Copic friendly ink and coloring up Diana with Copic Markers in the Red, Blue and Gold theme.  I used a grey marker on the bottom to ground her.  Next, I used my scan and cut to cut her out.  I used a straight blade to carefully cut a slit inside her legs and then my super pointy fussy cutting scissors to finish removing the white uncolored cardstock.

Next taking an A2 white card panel, I used a blue and red ink from my stash to ink blend a very loose background.  I didnt blend the colors together much or concentrate on making a very smooth blend as I was leaving some white to show through and I knew I would be using a background stamp as well.

I lined up my blended card panel and the Hit the Brick background stamp (a Unity Stamp Co and Brutus Monroe Collaboration) in my Mini Misti.  I first stamped the background with some black ink.  Then I wiped of my stamp and using a Ranger blending tool and foam circle, I added Deco Foil Transfergel to the stamp.  I applied the gel to the foam circle with my finger and carefully pounced the stamp over the entire background stamp, adding more transfer gel to the foam as needed.  I stamped the background and when I lifted the Misti lid the panel stuck to my stamp, (this is fine, I ran my fingers over the backside to make sure the transfer gel attached the the panel).  I carefully removed the panel and set it aside to dry. (about 30-60 mins)  Next I took a small paintbrush and carefully brushed the 
parts of my Diana stamp that I wanted to be gold (belt, necklace, tiara, boots, cuffs) and set that aside to dry.  I very quick cleaned my stamp, paintbrush and even my foam circle with some water to remove any leftover transfer gel.

I found a piece of red cardstock from my scratch paper and cut it down to just shy of 4.25" x 5.5" to be a mat for my colored panel.  I used a circle die that would fit around the sentiment from the Diana girl set and cut it out of the center of the red panel.  Using my powder bag to treat the circle, I stamped the sentiment with embossing ink (with the help of my mini Misti) and covered the sentiment in Gilded Embossing Powder from Brutus Monroe.  I set the sentiment wiht my heat tool.

Once my panel and Diana Girl were dry, I covered them with Deco Foil Gold Foil and ran them through my preheated laminator (twice).  I just love the reveal of peeling back the foil to see the final results.
I used liquid glue to attach my sentiment circle and Diana to my Brick Wall background and then that panel to my red mat.  After attaching everything to my card panel, I decided I wanted to enchance the stars on her costume.  I used a star border die from my stash to cut out the stars and attach them to the thigh and breast of Diana (where the black star stamped).  I also added a few of these white star around my sentiment.

Here is a close up of the foil, the picture does not do the shine justice. But oooh and look at the texture on the bricks.


What do you think?  Don't you just love it?  The inspiration for this card is my Aunt who is undergoing Chemotherapy this week. She is a wonderful woman and I admire her so much.  I plan on mailing this card to her right after the new year.

Supplies
Black Copic Friendly Ink
Copic Markers
Red and Blue Dye Inks with Blending Brushes
White and Red Cardstock
Embossing Ink
Gilded Embossing Powder -Brutus Monore
Deco Foil Transfer Gel
Deco Foil Gold Foil Sheets
Ranger Blending Tool and Circle Foam
Liquid Glue
Laminator
Scan and Cut/Scissors
Circle Die Cut
Big Shot Die Cutting Machine


Tuesday, December 29, 2020

2020 Growing In Unity Week Post #2

For my second Growing in Unity Week post, I focus again on an Angie Blom stamp, but this time I had to include the guys.  I used the Forrest Guy stamp set to create a birthday card for my guy.  His birthday is coming up and I thought this would be a perfect chance to be ahead in my card making for once.  

I started by stamping out "Forrest" in Copic friendly ink on an A2 card panel made from Neenah 110 lb cardstock.  I colored him in with Copic markers.  Next, I cut him down using some rectangle dies from Hero Arts.  I wanted the panel to be smaller so we could see the other panel I made.


My second panel was very fun to make.  I just took a green piece of cardstock from my scrap bin and cut it down to A2 card panel size.  I used the Vintage Burlap Background stamp in my Misit with Embossing Ink.  Next I usedBrutus Monroe Raven Sparkle Embossing Powder in a couple of spots on my background and carefully flipped over my panel to "throw" off the extra powder onto a scrap sheet of copy paper.  I did this careful "throw" technique because I wanted to used a second embossing powder on the rest of the background.  I chose a clear powder from Brutus Monore and followed the same steps as above.  Then I used my heat tool to set both embossing powders.  I like the two tone look that the embossing powders givee my background. (In hindsight, I would do the clear first and then the black, as there is always some leftover and I do not want to contaminate or waste any embossing powder.)

Here is a close up of the two different embossing powders.  The Raven Sparkle has a little glitter in it which is why its one of my favorite black Embossing Powders.


I also used the same ink and Raven Sparkle Embossing Powder for my sentiment on another piece of the same green cardstock and attached it to the front of my colored panel.

I glued both the background and colored panel down on an A2 Black Card Base.  For the inside of my card I messily stamped the same Vintage Burlap stamp in the corner of a white card panel with a light green ink and a sentiment for my honey with black ink.  

Thank you for stopping by and don't forget to leave a comment for a change to win some Unity goodies at the end of my week.

Do you struggle with Masculine cards like I do?  What is your favorite Unity stamp for masculine cards?


Supplies Used

Monday, December 28, 2020

2020 Growing in Unity Post #1


Happy Monday!  We have made it to the last week of the year.  I was lucky enough to be chosen to be the Growing in Unity Girl of the week.  I will be posting a project every day this week (M-F) using different Unity Stamp Company products.  Make sure to stop back every day and comment for a chance to win one of two prizes from Unity Stamp Co

I first heard of Unity during one of Angela and Whitney's lives on Facebook.  I thought they were so fun and engaging.  I then met them when I took a class at Junkiefest in 2019 not knowing that they were a company located in my home state of Minnesota.  I fell in love with their Angie Girl stamps and the obsession began.  Over the past two years, I have grown my Unity stamp collection which is primarily made up of  the faceless girls and background stamps.

Today's card is a very simple one that was inspired by my daughter, who lives over 1,000 miles away from me. The stamp I featured is the Wear Confidence stamp set by Angie Blom.  I started by stamping out our girl on some white cardstock with a Copic friendly ink and then colored her in with some teal as that is my daughters favorite color.  She has beautiful long brown hair that I also included in my coloring.  I fussy cut her out and then started on the rest of my card.

Close up to show the shimmer on the corset, which of course is super sparkly in person.


I decided to make a mini slim card.  I took a Neenah Classic Crest Solar White 110 lb cardstock, cut down to  7x6 inches and scored at 3.5 inches to make a 3.5x6" card Portrait card base.  I cut another piece of white cardstock down to 3.5x6" and used an oval die from my stash to cut out a window in the panel.  Then I ran the panel through my Big Shot using the Swiss Dots embossing folder.  (The panel is a little long, so I flipped it around and ran it partially through my machine again to finish the pattern, keeping just a very small space that did not emboss all the way.)

I used some Guppy Ink from Simon Hurley Creates and a blending brush to ink my card base just were it would show through the window.  I used a thank you sentiment (with a teal ink) from Brian guy in the small unembossed area on my Swiss Dot panel. If any dots where there, I used my bone folder to press them down and make the area smooth.  Next I glued the panel to my card base.  I used liquid glue to the back of my Copic colored girl and used my tweezers to slip it behind my embossed panel.  I stamped the sentiment from the stamp set inside my card in the same teal ink I used on the front of the card.

Finally, I added some clear wink of stella to the corset top and center of the yellow flowers of my colored image to give a little sparkle. This card fits in a standard letter envelope, which is one of the reasons I really like the mini slim size.

I love this card and it just reminds me so much of my girl.  I love how she is not afraid to wear what she wants and do her makeup as her mood fits her.  She has a saying she used in high school show choir and dance; "fake it to you make it!" and I think this saying just fits so well with that.  Be confident. no matter what you are wearing.  If you like it, then go for it.  I wish all of our young ladies and little girls could just have that embedded in their heads.  

What do you think of my project?  Do you have a favorite Angie Girl? If so, which one? (I have used one on 4 of my 5 projects this week)  

Thanks for stopping by and don't forget to come by tomorrow where I will share a fun birthday card I made for my honey's upcoming birthday!


Supplies Used:


Hugs and Kisses Challenge Card (Brutus Monroe)

 This month's CYOEchallenge on the Brutus Monore Fan Club Page is: Break out your sparkles and lets make some fun cards.  I started off...