This week the design team is creating something "gifty" (something that coordinates with a pretty gift bag, tag, card or a gift itself.). I decided to use a template that was created by the lovely Gina K early this year during one of her live crafting nights to make an A2 gift box that holds 5 cards with envelopes.
My cards feature the Candy Stripe 6x6 Paper pad papers, some digital files from the Brutus Monroe Store and a variety of other products (stamps, dies, embossing powder, etc).
 |
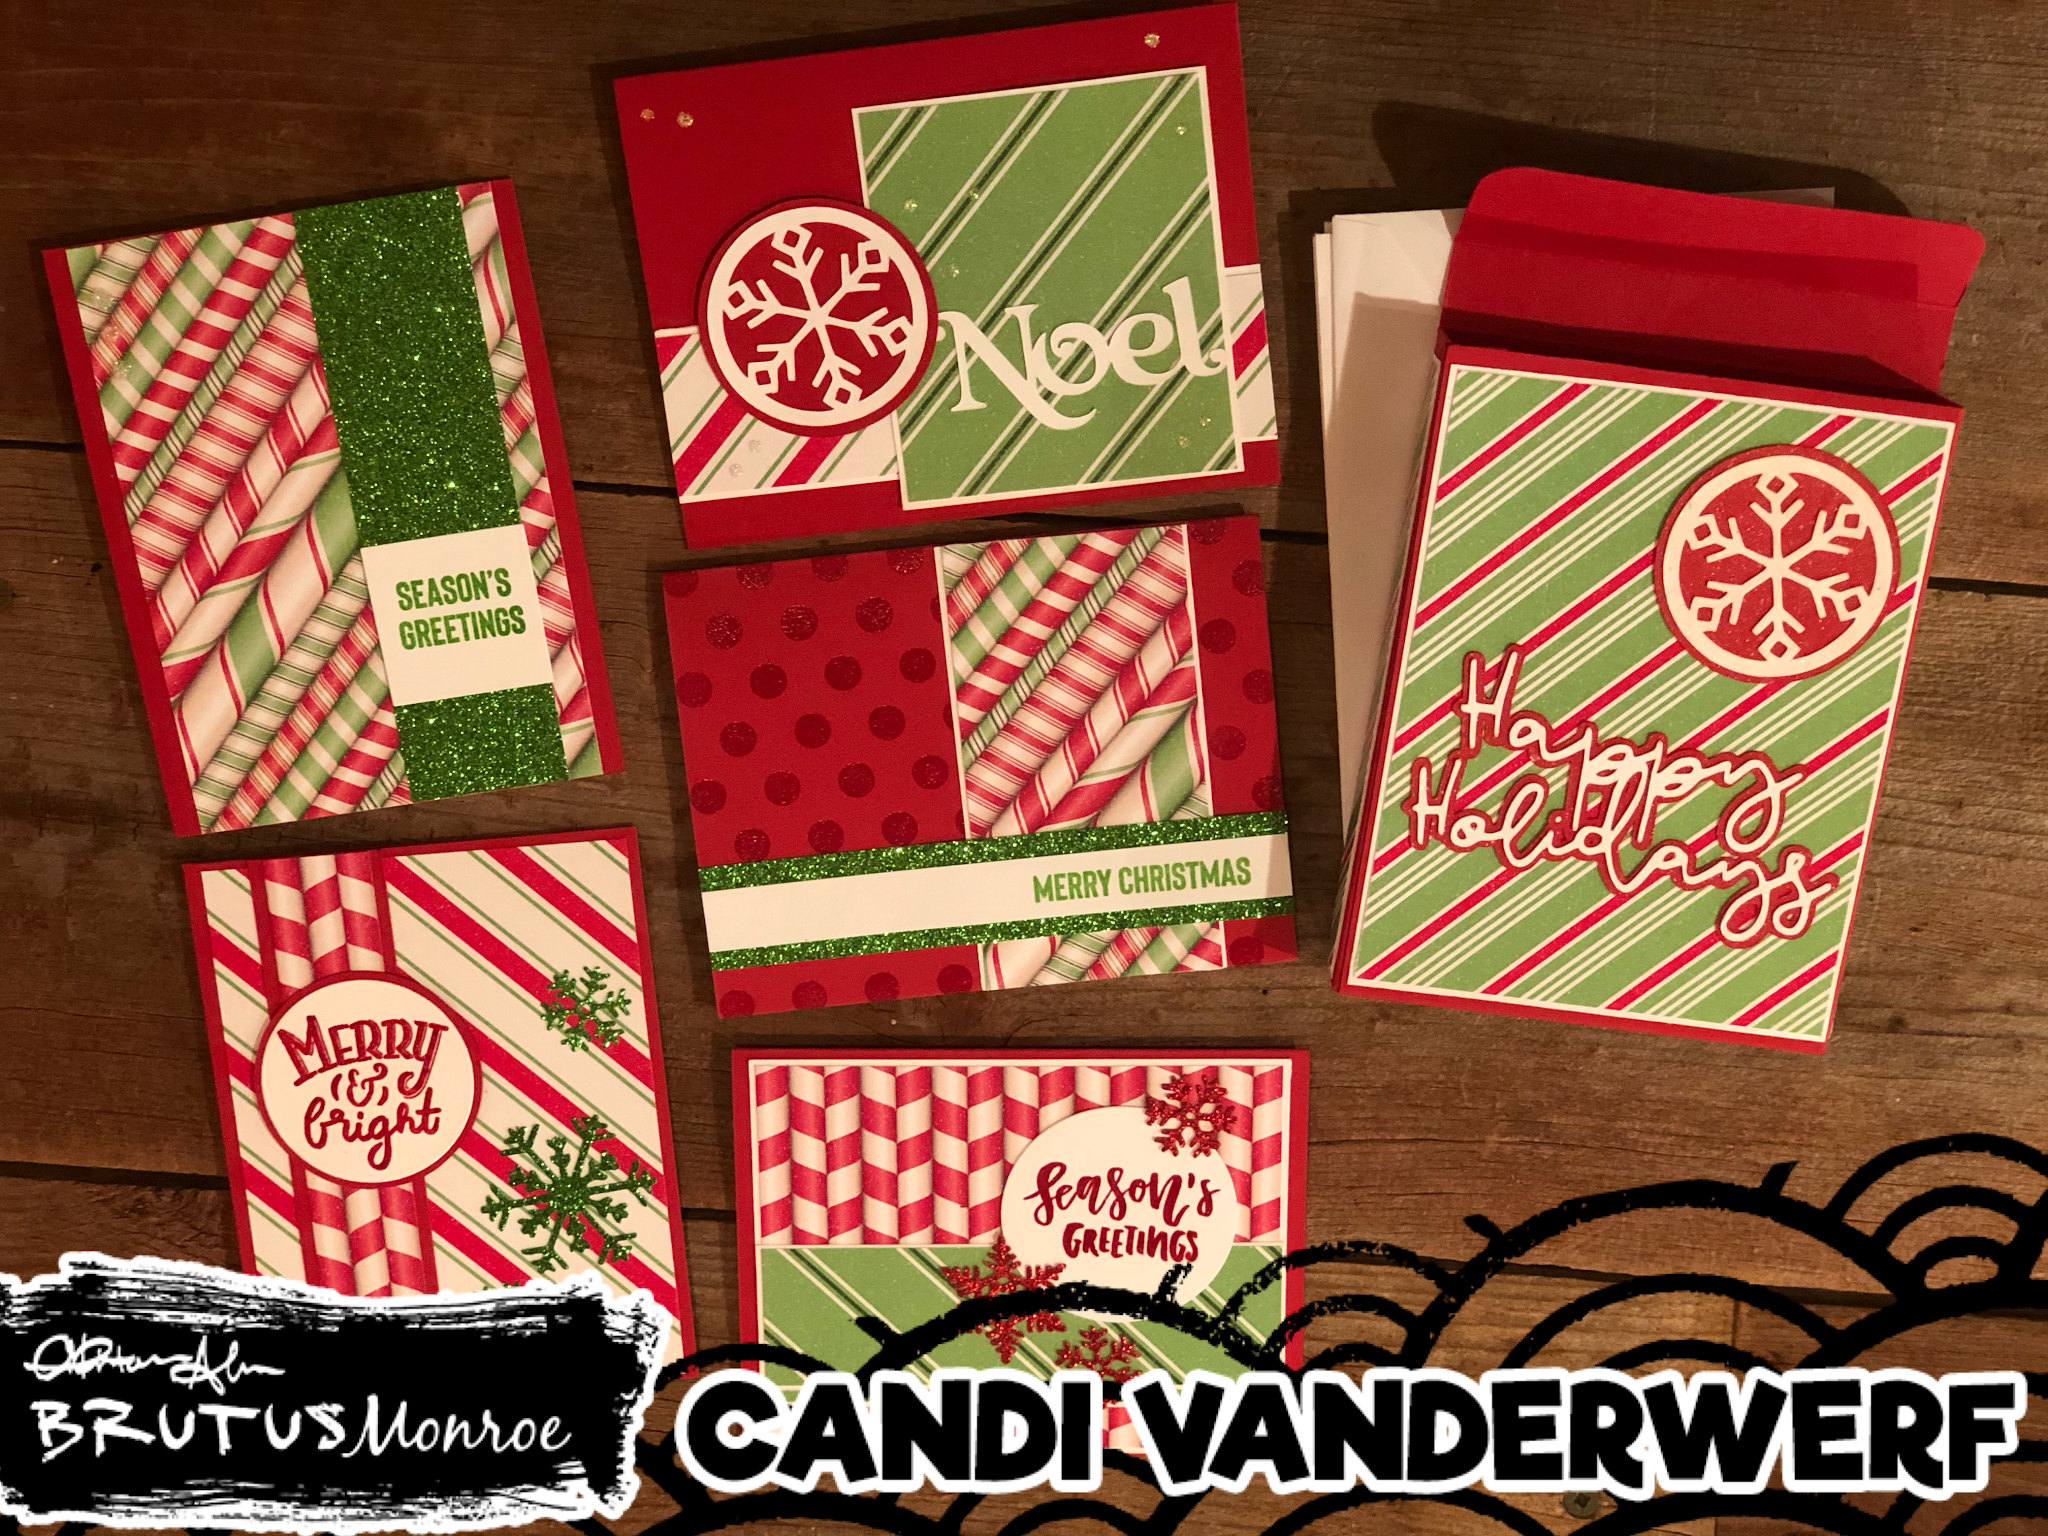
| Here is the box with the cover and has the 5 cards and envelopes inside |
All the patterned paper from these cards is from the Candy Stripe 6x6 pack and any white or glitter card stock came from my scrap bin. All of my cards are an A2 card size and made from red heavy weight cardstock from my stash.
Card #1

I had the help of some card sketches to help me with a few of my cards. For Card #1, I used the MFT Sketch #352, with measurements, that I got from this blog. I matted the patterned paper on scrap white card stock about an 1/8th bigger for the mats. I used the same Vixen Shaker Snowflake Digital Cut file and mat layer that I cut for the front of the box for this card. The Noel sentiment was a free file in my Scan and cut. To finish off my card, I used some Diamond Stickles in a random pattern across my card front for some glitz/sparkle.
Card #2
This card used MFT Sketch #286 and more of the Candy Stripe pattern paper. I used one of the middle foundation dies to cut a circle from some white scrap card stock. I used the Season's Greeting sentiment from Falliday Silhouettes in a red ink from my stash. However before I removed it from my Mini Misti, I cleaned my stamp and used my embossing buddy over the stamped image and restamped the sentiment over the top with the Brutus Monroe Embossing Ink. I then covered the red/embossing ink with Icicle Embossing Powder and heat set it. This gives me the color I want, but also a shine to my sentiment. Next, I cut two and one of the second smallest of the small simple snowflakes dies from some of the red card stock that matched my card base. However, I did not like how the snowflakes were lost on the card. So I also cut them out of scrap red glitter card stock and adhered them over the top of the red snowflakes.

Card #3

Using Sketch #249 from Freshly Made Sketches, I cut and matted my patterned paper. I found a piece of green glitter stock in my scrap bin that matched the green in the patterned paper. Before I attached them to my card, I decided to find a background stamp for my card base. I stamped the polkadot background with my Brutus Monroe Embossing Ink and again used the Icicle Embossing Powder and heat set it. I attached my patterned paper to the base. I used a piece of white scrap card stock to stamp my sentiment from Holiday Essentials Stamp set with Later Gator ink by Simon Hurley Creates and then covered the ink immediately with the Icicle Embossing Powder and heat set it. This gives the sentiment a shine. I used liquid glue to attach it to the top of the glitter stock layer.
Card #4

I did not use a card sketch for my last two cards. Both of these patterned papers were left overs from some cut cards tock from earlier so I used them just as they were. I matted the smaller piece on some red scrap card stock and adhered both to my A2 red card base. I stamped the Merry & Bright Sentiment, from the Merry & Bright stamp set in Red ink, then Embossing Ink like I did before and covered it with Icicle Embossing Powder and set it for the that shine. The white and red circles were sitting on my desk so I am not sure exactly what size they are. I used the same green glitter stock scrap from before to cut out more snowflakes and attached them to the finish off my card.
Card #5 I did the same for this card using leftover piece of the paper from previous cards. I chose the Season's Greetings from the Holiday Essentials set and performed some stamp surgery, Jennifer McGuire style, so that my sentiment would stack on top of each other. (Don't worry I can put the stamp back in a line to stamp in the future. I used the Later Gator with Embossing Ink and Icicle Embossing Powder over the top just like I did for all the other cards. Then using a Square Foundation die, I cut down my sentiment and used liquid glue to affix it to the glitter layer. For a final touch of bling, I used the same Diamond Stickles to add three dots to the upper left corner to balance out the white square.

Here is a close up of the cards inside the box

Here is an attempt to show the shimmer that I added to the cut outs on the front of the box.
Thanks for stopping by. Which one is your favorite card? Have you started making holiday card yet? Leave me a comment below.
Products Listed below have affiliated links to the Brutus Monroe Shop. (These links are at no additional costs to you. Thank you for your support)
- Candy Stripe Pattern Paper Collection
- Falliday Silhouettes Stamp Set
- Holiday Essentials Stamp Set (retired)
- Merry & Bright Stamp Set (retired)
- Vixen Snowflake Shaker Digital Cut File
- Happy Holiday Digital Cut File
- Circle Foundation Dies
- Square Foundation Dies
- Simple Snowflake Dies
- Embossing Ink
- Icicle Embossing Powder
- Simon Hurley Creates Later Gator Ink

 |
| Here is a close up of the cards inside the box |
 |
| Here is an attempt to show the shimmer that I added to the cut outs on the front of the box. |
Thanks for stopping by. Which one is your favorite card? Have you started making holiday card yet? Leave me a comment below.
- Candy Stripe Pattern Paper Collection
- Falliday Silhouettes Stamp Set
- Holiday Essentials Stamp Set (retired)
- Merry & Bright Stamp Set (retired)
- Vixen Snowflake Shaker Digital Cut File
- Happy Holiday Digital Cut File
- Circle Foundation Dies
- Square Foundation Dies
- Simple Snowflake Dies
- Embossing Ink
- Icicle Embossing Powder
- Simon Hurley Creates Later Gator Ink


No comments:
Post a Comment