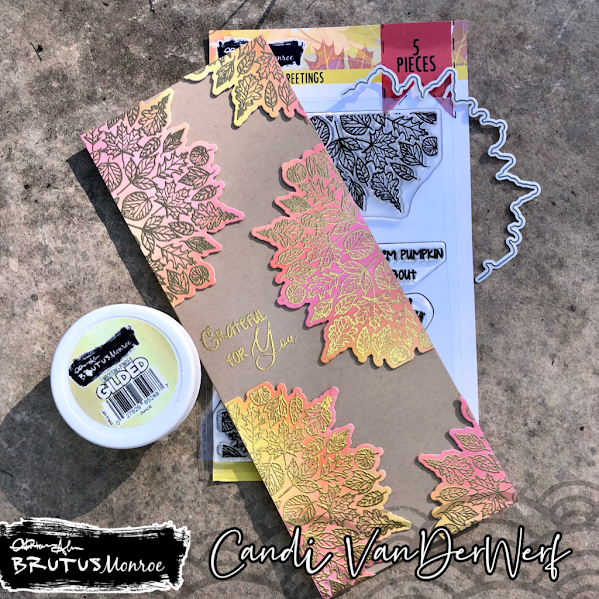
I started by taking Bee Sting, Sike! and Slippery When Wet inks from Simon Hurley Creates and blended up a couple of white card panels. Then I used my antistatic bag to treat the front of the panels, lined them up (individually) in my Original Misti and stamped both of the leaf images from Grateful Greetings with Brutus Monroe Embossing Ink. I covered the ink with Gilded Embossing Powder and heat set it. (I repeated this until I had 6 embossed images--I only needed 5).
Next I cut out each of the Embossed panels with the coordinating die, and trimmed the end off with my paper trimmer. I also cut out 10 pieces of the die cut with Kraft paper. I stacked two of each die cut together with liquid glue and attached one of my Inkblended/Embossed images on top. This creates dimension for the front of my card. I created my card base from some Kraft Colored cardstock. I cut the 8.5" x 11" cardstock down to 8.5" x 7" and scored at 3.." This creates a slim line card base that measures 8.5" x 3."
I chose my sentiment from the stamp set and used my die cuts for placement and then stamped it in Embossing Ink. I also covered it with Gilded Embossing Powder and heat set it. Then I used liquid glue to attach one of my Embossed Die cuts opposite of my sentiment. Then I placed two of the Embossed Die cuts to the left side of my card base. For my last two pieces, I attached them at an angle on the right side of my cardbase in each corner. Finally, I used my paper trimmer to cut off an overhanging piece of die cuts.
Here are (affliated) links to the products used in the Brutus Monroe Store-as always affilated links do not cost you anything extra, they just help me bring you new content.)
- Grateful Greeting Stamp Set
- Grateful Greeting Die Set
- Lunch Bag pCover Stock (I used a kraft color for my stash but this would be a similar color).
- Embossing Ink
- Gilded Embossing Powder
- Simon Hurley Bee Sting Ink
- Simon Hurly Sike! Ink
- Simon Hurley Slippery When Wet Ink


No comments:
Post a Comment